There are two types of exports available on the Exports page: Export Requests and Export Dimensions.
Export Requests
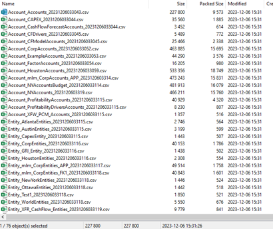
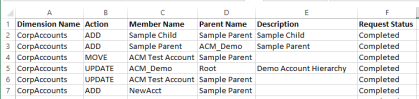
The Export Requests allows users to export request details into a file and folder of their choice. Here is an example of an exported .csv file:
You can configure which properties and information is included in the export file. There is also an option to run the export by a date range as well as the option to setup an Export step in a Request Profile to run the export every time a request is committed.
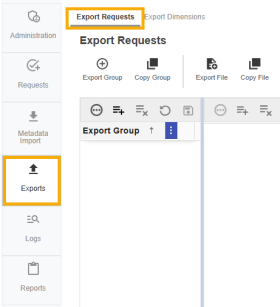
To configure the Export criteria, navigate to Exports on the left navigation bar and select Export Requests.
Use the + and - icons to add or remove items in the grid. Below is an example of an Export Group, files, and the file content setup:

-
Export Group: A collection of files to be exported
-
File Name: The title of the file
-
Export Location: The file location after it is exported
-
Local
-
File Share
-
-
File Path: The location of the file
-
File Extension: File extension examples include txt, pdf, xls, doc, and csv.
-
Delimiter: Delimiters are used to separate the export properties on file
-
OverwriteFile: If selected, the file can be overwritten
-
HasHeader: Indicates if the file has a header row
-
PropsInRow: If selected, properties in the row can be set
-
FilterActions: This setting is used to specify if only certain actions are allowed to get exported. If not selected, all actions will be included in the file.
-
FileActions: Actions that can be added to the file such as add, modify, and remove
-
The next section allows you to specify data or properties that are included in the export file.
![]()
-
Header Label: Description of the header column of your choice
-
Order: Display order of the header columns
-
Field Type: The type of header properties. Selections include:
-
Input Value
-
Property Value
-
Property Name
-
Property Label
-
Flow Action
-
Flow Dimension
-
Flow Dimension Label
-
Flow Dimension Name
-
Request Status
-
-
Property: Name of the property
-
Input Value: If the Field Type is not defined, this will be the default value for the property.
-
FixedInRow: If PropsInRow is selected, the export will look for properties that are not set as FixedInRow
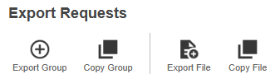
Export Requests Toolbar
-
Export Group: This will bring up the date range window. Click Create to run the export for all files within the selected group.

-
Copy Group: Make a copy of the selected group and all the files within the group.
-
Export File: This will bring up the date range window. Click Create to run the export for the single selected file.
-
Copy File: Make a copy of the selected file and all of the properties criteria within the file. _COPY will be added at the end of the file name.
Set up an Export Step in the Request Profile
An Export step can be added to any Request Profile after the Initiate step but prior to the Commit step. When the request reaches the Export step, the user will manage the request by clicking on the Manage icon from the home page. Then click Submit to advance to the next step. The export process will run when the request is committed.
When adding the Export step in the Request Profile, select the Export Group from the drop-down. This is required for the Export step to save.

Export Dimension
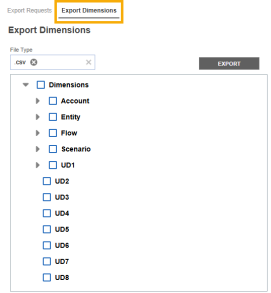
Dimensions can be exported into CSV format. Exported dimensions populate as a .zip file to the file location selected by the user within File Share. The dimension(s) exported are individual CSV files sorted by dimension type in the .zip file.
NOTE: When looking for a dimension, you can search by inputting a partial name of the dimension above the hierarchy view.

Dimension data is in Parent-Child relationship format and contains all OneStream properties.
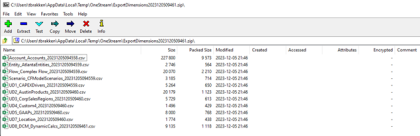
The following is an example of a .csv file:

NOTE: Custom properties created in Application Control Manager are not included in the export.
For members that are shared across different parents, it will display each relationship in separate rows. This is the same for members containing varying member properties.
When selecting a folder, ensure it is a folder you have access to otherwise an error message will populate.
Steps to Export a Dimension
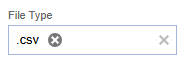
-
Select the drop-down menu for your file type.
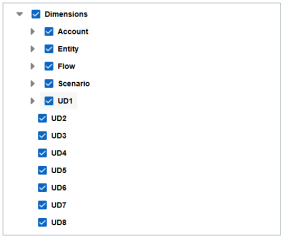
-
Choose the dimension(s) you would like to export in the hierarchical tree view. You can multi-select the dimensions or select all dimensions.
-
Once your selections have been made, click the Export button on the right side of the page.
-
Notice your file explorer pops up. Select a folder to add the .zip file to.
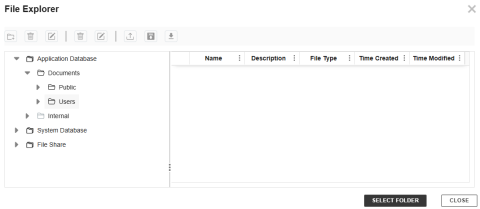
-
Once the file has successfully loaded, open the file and find your .csv files split up by dimension.