-
Click System > Security > Users.
-
Click Create User.
-
Enter a name and description.
-
From User Type, select the purchased license type (this property does not control access to artifacts):
-
Interactive: They can use all features and tools.
-
View: They can access data, reports, and dashboards in a production environment and associated database, but cannot load, calculate, consolidate, certify, or change data.
-
Restricted: They cannot use some OneStream Solution features such as Lease, Account Reconciliation and more due to contractual limitations.
-
Third Party Access: They can access applications with a third-party application by logging in using a named account. They cannot change data, modify artifacts or access the Windows application or a browser-based application.
-
Financial Close: They can use Account Reconciliation and Transaction Matching OneStream Solutions.
-
-
Set Is Enabled to True to activate the user. Select Falseto deactivate the user.
-
The information in Status will reflect the user's activity, such as their latest login. Inactivity Threshold displays the number of days a user can remain active in the system without logging in. The user receives an error if they try to log in after the specified number of days elapses. See Creating Users.
-
Read About User Authentication, then Specify Authentication Settings.
About User Authentication
You can add and authenticate users as:
-
Native users that are managed locally in OneStream.
-
External users referenced by an external identity provider (IdP).
Specify Authentication Settings
-
From External Authentication Provider, indicate how to authenticate the user:
-
To use native authentication: Select Not Used and enter the user's password in Internal Provider Password. The first time the user logs in, they can change their password.
-
To use external authentication:
-
Select the appropriate external IdP from External Authentication Provider.
-
In External Provider User Name, enter the user name in the IdP. For example, if a user's name in Azure AD (Microsoft Entra ID) is Azure_LHall@azure.com, enter Azure_LHall@azure.com. This name must be unique and match the user name in the IdP.
-
-
Specify Preferences and Group Membership
-
In Email enter the email address with which the user can receive alerts and messages, such as those generated with business rules.
-
In Culture select the user's locale. Supported locals and languages are specified during OneStream server configuration. See International Settings.
-
In Grid Rows Per Page specify how many rows to display on grids before a page break. Consider the rate of connectivity and screen resolution.
-
Use Custom Text to personalize aspects of functionality given the user's responsibilities. For example, you could define a text field to:
-
Act as a metadata tag, limiting who the user can email.
-
Filter a distribution list or to provide text and images for the user's default workflow profile.
-
Launch a functionally-tailored view of the user’s workspace, such as reporting for controller or executive.
See "Text 1-8" in Entity Dimension.
-
-
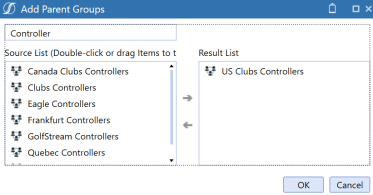
In Group Membership, click Add Groupsto include the user in the groups that provide access to the features and tools that the user needs.

If the appropriate group does not exist, define it. See Creating and Managing Groups. -
Click OK, Save and then Load.
When processing finishes, review the user list and user settings to ensure the loaded users are correctly defined.


