Administrators and book owners can create and manage report books using the Narrative Books page in Settings > Book Management. When managing books, follow these guidelines:
-
Book and section names can be repeated.
-
Each book can contain multiple sections.
-
A section must only be assigned to one book.
-
Two levels are supported in the navigation tree. For example, a section can be placed under another section.
-
Each section can contain multiple documents.
-
A document must only be assigned to one section.
-
Document names must be unique in a single book, but they can be repeated across books.

The Books grid displays the following information:
-
Name (required): The name of the book.
-
Description: The description of the book.
NOTE: Book names and descriptions can be duplicated. The maximum number of characters is 500.
-
Display Order (required): The order the book is displayed in the grid and in the Narrative Reporting home screen book drop-down menu.
-
Owner Group: The security group that owns the book and all documents within the book. The default is Everyone.
-
Viewer Group: The security group that can view the book and all documents in the book. The default is Everyone.
-
Approver Group: The security group that can approve the book and all documents in the book. The default is Everyone.
-
Cube View Profile: Sets the Cube View Profile for the book. Cube View Profiles determine which Cube View Groups display for users when they are inserting Cube Views into their documents using the Add Content wizard from the Artifacts tab on the Details pane.
-
Enable: Determines whether the book is displayed to users in the drop-down menu above the navigation tree in Narrative Reporting. The Enable checkbox is selected by default. To remove the book from the drop-down menu, clear the Enable checkbox.
-
Created By: The user who created the book. User details are automatically added when a book is created.
-
Created On: The date the book was created. This field automatically populates when a book is created.
-
Parameters: A field that can be referenced in a document to ensure data accuracy. Only custom, literal parameters you want to use in your books need to be entered using this column. Substitution variables and OneStream Workspace parameters can be entered directly into your narrative document using Quick Parts without creating it and saving it to book management.
Example: Parameter Name = Parameter Value
NOTE: Multiple parameters can be entered in this field separated by commas. If a comma is included in the value of a parameter, enclose the value in brackets. For example, Reporting Date = [Month Day, Year].
Narrative Books Management
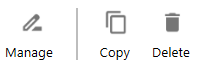
Manage, copy, or delete a book by selecting it from the grid and clicking the respective button.
-
Manage: This opens the Sections and Documents page where you can edit the structure of the book. See Sections and Documents.
-
Copy: This copies the selected book and associated documents.
NOTE: All statuses for the copied documents are set to checked-in during the copy process.
-
Delete: This permanently deletes the book and all associated documents, regardless of statuses.
Sections and Documents
Administrators and book owners can manage the structure of narrative books using the Sections and Documents page.
-
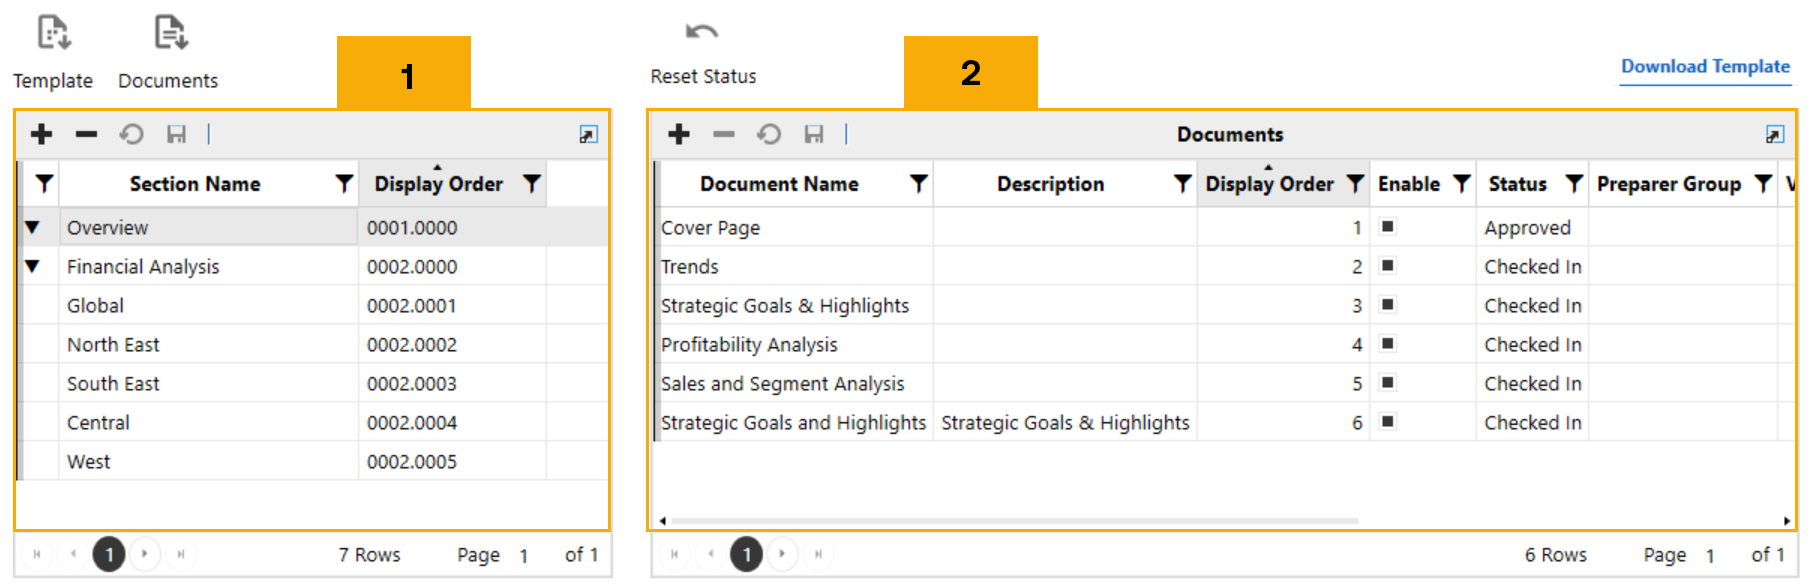
Create the structure of the book in the Sections grid . This structure is mirrored in the main display through the navigation tree.
-
Upload documents to the database and create your narrative book in the Documents grid.
-
The Sections grid displays the sections in a narrative book and includes the following information:
-
Section Name: The name of the section.
-
Display Order: The order the section is displayed in the book and in the navigation tree. When the number ends in a zero after the decimal place, such as 1.0 or 2.0, a new section indicator
 is automatically added to indicate a top-level section. The format must be ####.####, including the leading zeros.
-
-
The Documents grid displays the documents in each section and contains the following information:
-
Document Name: The name of the document. Names must be unique in a single book, but they can be repeated across books.
-
Description: The description of the document.
-
Display Order: The order in which the document is displayed within the section and in the navigation tree. The Display Order cannot be zero.
-
Enable: This determines whether the document displays in the navigation tree after a book is selected. The Enable checkbox is selected by default. To remove the document from the navigation tree, clear the Enable checkbox.
-
Status: Displays the current status of a document.
-
Preparer Group (optional): The security group that can edit and submit the document for approval. This security group is in addition to the Book Owners group. The default is Everyone.
-
Viewer Group (optional): The security group that can view the document. This security group is in addition to the Viewer group and can be left blank. The default is Everyone.
-
Approver Group (optional): The security group who can approve the document. This security group is in addition to the Approver group. The default is Everyone.
-
Source File Name: The name of the source file including the file extension.
-
Imported: This indicates if the file has been imported into the table.
-
Page Break: When enabled, this setting determines if a page break will be added after the document when the Merge function is used. When not enabled, the contents of merged documents will display without additional spacing or paragraph breaks.
-
Mode: Determines how the document can be opened for editing. Document modes include the following options:
-
OneStream Editor: Users can edit and refresh documents dynamically using XF docs and document variables directly in Text Editor and Spreadsheet.
-
Office (Processed): Users can edit and refresh documents dynamically using XF docs and document variables directly in a Microsoft Office application.
-
Office: Users can check out a document to a Microsoft application, edit it, and check it back in so all users can see the latest changes. See Work with Documents.
-
-
Parameters: A field that can be referenced in a document to ensure data accuracy. Only custom, literal parameters you want to use in your documents need to be entered using this column. Substitution variables and OneStream Workspace parameters can be entered directly into your narrative document using Quick Parts without creating it and saving it to book management.
Example: Parameter Name = Parameter Value
NOTE: Multiple parameters can be entered in this field separated by commas. If a comma is included in the value of a parameter, enclose the value in brackets. For example, Reporting Date = [Month Day, Year].
-
-
Reset Status: On the Sections and Documents page, click this button to set the selected document back to checked-in status.
Create the Navigation Tree Structure
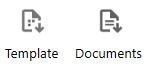
As an administrator or book owner, define the structure of a book by adding sections and documents individually or using the Import Template feature.
Sample Template
Click the Template button to upload a template containing the narrative book structure and create the sections and documents relationship. The template should be a comma-separated values (.csv) file. Click the Download Template button to access a sample template.
Before importing, consider the following information:
-
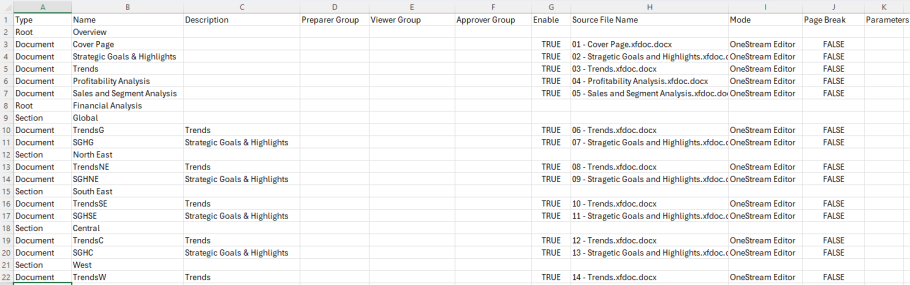
The display order is automatically generated based on the row order in the .csv file.
-
Import templates will replace the existing grid data.
Import the .csv file using the following fields:
-
Type: This describes the structure of the book. Enter Root, Section, or Document.
-
Root: This defines the top level of a section.
IMPORTANT: The template should always start with a Root type.
-
Section: This defines sections of a book.
-
Document: This defines the document.
-
-
Name (required): The name of the section or document.
-
Description: The description of the document. Description is optional for Section type.
- Preparer Group: The security group that can edit and submit the document for approval. The default is Everyone.
-
Viewer Group: The security group that can view the document. The default is Everyone.
-
Approver Group: The security group that can approve the document. The default is Everyone.
-
Enable: True or False field indicating if a document will display in the navigation tree. The default value is True when the field is left blank.
-
Source File Name: The unique name of the source file including the file extension.
-
Mode: Determines how the document can be opened for editing. See Mode in Document Grid.
-
Page Break: When enabled, this setting determines if a page break will be added after the document when the Merge function is used. When not enabled, the contents of merged documents will display without additional spacing or paragraph breaks.
-
Parameters (optional): A field that can be referenced in a document to ensure data accuracy.
Documents
After you define a book structure, you can import individual documents or a .zip file using the Documents icon. Supported file types include Microsoft Word, Excel, and PowerPoint documents. Before importing, make sure the file has been saved and closed.
-
From Sections and Documents, select a section.
-
Click the Documents button.
-
Use File Explorer to select your file. Click the Open button.
Export Book Content
Click the Export Book button to extract all book and document details into a .csv file. This file enables you to quickly import your narrative reporting details across environments and applications.


