Follow these steps in the wizard to insert content using a Microsoft Word document or OneStream Text Editor for Extensible Documents.
-
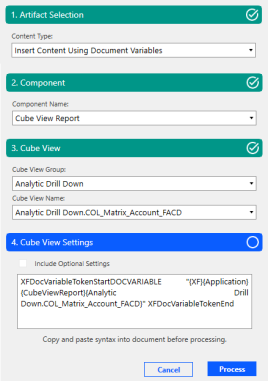
In the Artifact Selection section, from the Content Type drop-down menu, select Insert Content Using Document Variables.
-
In the Component Name section, choose an option:
-
Cube View Report
-
Excel Sheet
-
Excel Named Range
-
Microsoft Word Document
-
-
The header and available fields in step 3 dynamically update based on your previous selection.
-
For Cube View Report, the header displays as Cube View, and you can populate these fields:
-
Cube View Group: The group containing the Cube View.
NOTE: The Cube View Groups displayed are defined by administrators when assigning Cube View Profiles. See Book Management.
-
Cube View Name: The name of the Cube View. All Cube Views associated with the Cube View Group are displayed.
-
-
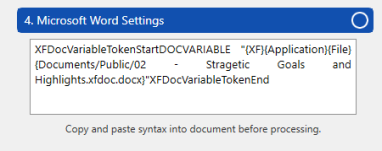
For Excel Sheet, Excel Named Range, or Microsoft Word Document, the header displays with the respective selection. Complete these steps:
-
Click the Browse button.
-
Use OneStream File Explorer to select a document from your files. When done, the Select a File text is replaced with the name of the file you chose.
-
-
-
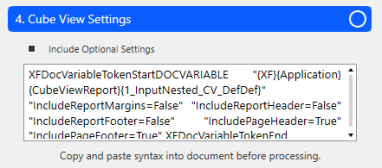
The header name dynamically updates based on your previous selections. For example, a Cube View selection in step 2 would display Cube View Settings in this step.
Cube View Report and Excel Sheet selections enable you to select the Include Optional Settings checkbox. If you are not using Microsoft Word, select Include Optional Settings to include additional formatting options with your parameters. Formatting options depend on the component you are inserting. In the following example for Cube View, additional setting options include headers, footers, or margins for the Cube View.
| Microsoft Word Example |
|
|
Cube View Settings Example |
|
-
Copy the syntax from the Settings section and paste it into your document.
-
Click the Process button to save and render the embedded content. The Process button is only supported in the Windows Application.
Click the Cancel button at any time to close the wizard.


