Conditions
On the Conditions Page you can view Predefined Conditions, or create and edit Custom Conditions. All conditions can be viewed from the Conditions Table. There are a total of 38 Predefined Conditions, and the total number of conditions, including Custom can also be found here.
Conditions, either Predefined or Custom, will not scan OneStream Solutions and Partner Solutions. These are whitelisted.
On this page you can:
-
Create a Custom conditions.
-
Edit a Custom condition.
-
Delete a Custom condition. This action cannot be undone.
NOTE: Predefined conditions cannot be deleted.
-
Clear cache by selecting Refresh. The Conditions Table and the number of conditions refreshes.
-
Filter conditions with the Scan Item Type drop-down menu.

Conditions Table
-
Condition Name: The uniquely assigned name of the condition
-
Condition Description: A user-legible definition of the condition. This will appear on the Home page for users to select for future scans.
-
Natural Language Definition: The prompt informs the Large Language Model on how the condition acts once created, and how it scans code. This additional context will help aide the LLM in determining what to look for. It is best to be as specific as possible with the NLD, describing why the coding practice that the condition will look for should be avoided.
-
Condition Type: Defines whether a condition is either Custom or Predefined
-
Scan Item Type: Displays the type of scan the condition will run, Business Rule, Data Adapter, or All
-
Severity Level: Shows the severity of a condition, either High, Medium or Low
-
Refresh: Use to clear cache. The Conditions Table and the number of conditions refreshes.

IMPORTANT: You cannot create or edit Custom Conditions while a scan is running. This will avoid a concurrency error.
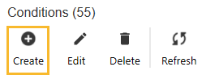
Create a New Condition
-
To add a new condition, click the Create button to be guided through the AI Component Workflow.
-
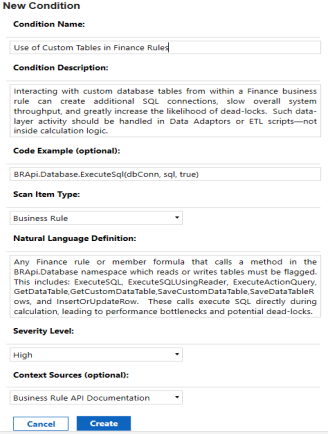
In the Condition Name text box, enter a unique name for your new condition.
NOTE: Names of conditions are unable to be edited later.
-
Enter a description in the Condition Description text box of what the bad practice in the code is that the scan trying to catch.
-
In the Code Example text box, enter a short code snippet of the bad practice described in the Condition Description. This field is optional, but will highly aid in accuracy of code scan results if used.
-
The Scan Item Type will determine what types of OneStream artifacts will be scanned for this condition. Use the drop-down menu to choose one of the following scan item types:
-
All
-
Business Rule
-
Data Adapter
-
-
In the Natural Language Definition text box, enter a prompt to inform the model of the condition requirements. The more detailed and specific a prompt is will result in a narrow and efficient scope when the condition scans the code.
Example: NLD prompt for an Error Log condition: Unnecessary logging with Brapi.ErrorLog.LogMessage increases system load and makes debugging harder by adding too much noise to logs, which can hide important errors. Instead, logs should be used only for meaningful debugging and be removed when no longer needed.
-
From the Severity Level drop-down menu, select the severity of your condition:
-
Low
-
Medium
-
High
-
-
Some conditions need additional context apart from face-value code to determine if it meets the criteria for being a bad practice. Context should be used only when necessary to increase accuracy in scans. If you specify unnecessary context to be included, it can lead to confusion and inconsistent results in the model. Use the Context Sources (optional) drop-down to select the parameter that the condition will be applied to:
-
Business Rule API Documentation
-
Database Table Schema
-
Application Metadata
-
-
Click Create and your saved condition will appear in the Conditions Table.
NOTE: If you click Cancel, the AI Component Workflow field closes without saving any changes.
Edit a Custom Condition
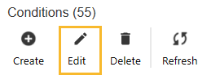
To edit a Custom Condition, select the condition and click the Edit button and the AI Component Workflow will open.
You can make changes to the following:
-
Condition Description: Edit the description describing the bad practice that informs how the condition will act
-
Code Example (optional): Input a different example of code that the scan will look for
-
Scan Item Type: Change the condition type
-
Natural Language Definition: Change the prompt that sets the model requirements and informs how the condition will act and scan code
-
Severity Level: Select the severity level of your condition
-
Context Sources (optional): From the drop-down menu, can change the parameter that the condition will be applied to
Click the Update button and the Conditions Table will refresh with your saved changes. Clicking Cancel will cause the AI Component Workflow to close without saving any changes.
NOTE: You are unable to edit Predefined Conditions.


