Control Lists
You can set up control lists for:
Item Types
When a Preparer creates Reconciliation Detail Items, these are the types of items that can be created. You can add new Item Types.
NOTE: An Item Type cannot be deleted once it is used in a reconciliation detail item or if the reconciliation is In Process. The Item Type can only be deleted when not in use.
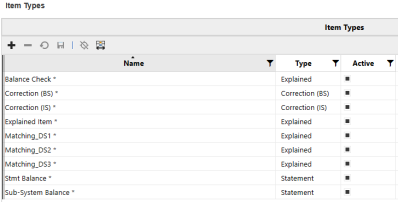
Name: : Item Type text that displays to the user when reconciling. The Name displays in the Item Type dropdown on the reconciliation when checked active.
Type: Type of item added to a reconciliation.
-
Correction (BS) or Correction (IS): These items indicate an issue with the current balance in the GL and requiring a correction.
-
Explained: A manually entered item.
-
Statement: An item supported with an attached statement such as a cash account statement.
Active: By default, this is set to True. If False, these Item Types do not display when creating items. When set to inactive, the Item Type Name does not display as an option in the Item Type dropdown in the reconciliation detail line item.
Reason Codes
When you click Reject or Unapprove, you are prompted to provide a Reason Code for the change. The Solution Admin can edit, delete, and add new reason codes.
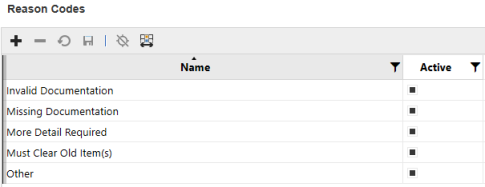
Name:: Reason Code text that displays to the user when entering a reason.
Active: By default, this is set to True. If False, these Reason Codes do not display when rejecting or unapproving.
Close Dates
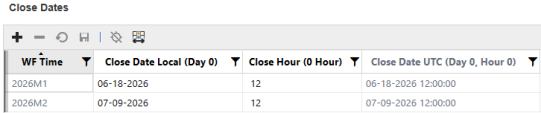
Close Dates associate a Workflow Time Period with a specific day and time. The purpose of this is to pivot from this date and time to determine if someone is late with their assignments, regardless of their location.
NOTE: If the Close Dates are not set up for a given period, then the date is 1900/01/01 on the Reconciliations page.
WF Time: Workflow Time Period. Click the + button to add one record for each Workflow Time Period related to the Source Scenario.
NOTE: The list of Workflow Time periods is for the currently selected Workflow Year plus the following year. This includes all frequencies of time (half years, quarters, months). The Input Frequency properties of each scenario (for example, Monthly) must match.
Close Date Local (Day 0): Set to the date when the financial close starts for this Workflow Time Period.
Close Hour (0 Hour): Set to the hour of day for what local time the close starts. For instance, if this is 5:00 PM, set this as 17. Local time is determined by the time zone where your OneStream server is located.
Close Date UTC (Day 0, Hour 0): No entry is required because saving the record calculates the value. The Close Date Local (Day 0) and Close Hour (0 Hour) are converted to the UTC (Coordinated Universal Time, aka GMT/Greenwich Mean Time) equivalent for the purposes of comparing the current local time for when a Reconciliation Inventory item is due.
Aging Periods
Aging periods are used to review your detail item aging, in total, so you can determine which balances need to be written off. The aging period is automatically assigned to an item upon Save based on the calculated aging and the periods created. Aging periods are used in the Aging Pivot analysis report. Each start date must be unique.
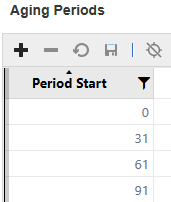
Period Start Date: Click the + button to add aging periods. For example, if you enter 16 for a new period start date, the first period is 0-15 days and the next period is 16-30 days.
The default period start dates are:
-
0: 0 to 30 days
-
31: 31 to 60 days
-
61: 61 to 90 days
-
91: 91+ days
Attribute Columns
You can create up to three configurable attribute columns to display in the Account Reconciliations page for users. They can be free-form text boxes or have a drop-down menu of values. These attribute columns will also display in the Inventory page and the Edit Reconciliation Attributes dialog box.
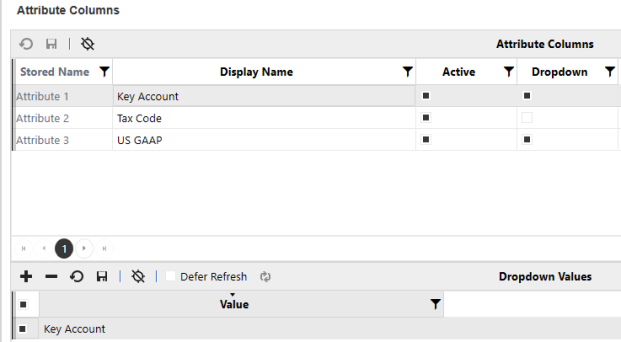
To add an attribute, first enter a display name and then select the Active check box for the attribute.
Display Name: Enter a name for the attribute. This name must be unique.
Active: Select this check box to make the attribute visible.
Dropdown: Select this check box to add a menu of values for users to select from.
Value: After you select the Dropdown check box for an attribute and save, the Dropdown Values section displays. Enter each value to display for users in a drop-down menu. Each value must be unique within that attribute.
IMPORTANT: Editing or removing active values that are in use may affect work in progress.
When a value is removed, it remains visible in historical records where it was previously used and does not appear blank. However, Solution and Local Admins can no longer select it when editing Inventory or Groups.
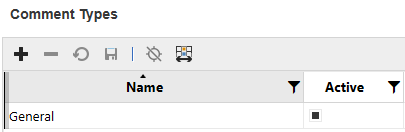
Comment Types
The Solution Admin creates comment types that are used by the commenters and above to add comments to the reconciliation. Comment types categorize the comments. The default comment types are General and Variance. The Solution Admin can create additional comment types which will display in the dropdown in the reconciliation when active. A comment type cannot be deleted or edited once it has been used in a reconciliation.