Formula Build Process
Perform these steps to build a member formula:
-
Select the dimension, member, and account you want to create the member formula.
-
Select Scenario Type and Time properties.
-
Build the formula and add calculation filters.
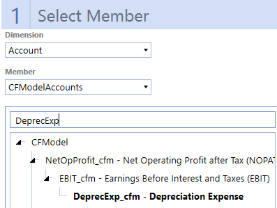
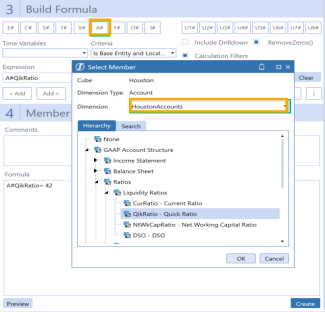
Select the Member
Select the dimension from the drop-down and then select the member.
TIP: To access a known member, use the search bar at the top of the Select Member pane to find the member or you can navigate through the hierarchy to find the appropriate member.
After you select a dimension, member, and account member for your formula, the other panes of the Member Formula Builder appear and you can continue the formula build process.
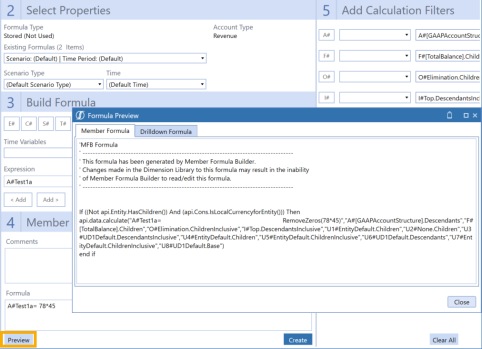
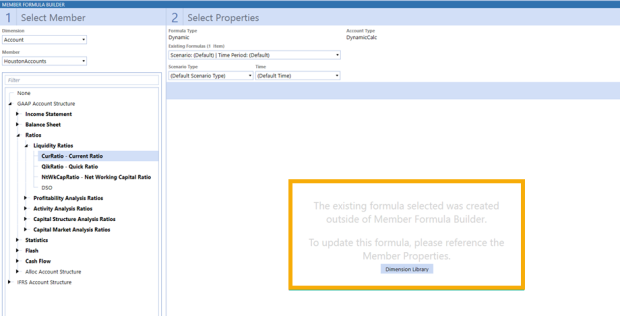
Select Properties
In the Select Properties pane, the Formula Type and Account Type labels show the formula or account type assigned to a selected member. The Existing Formulas drop-down list shows Scenario: (Default)|Time Period: (Default) and displays other existing formulas on a selected member. If you select the default Scenario and Time formula, the Scenario Type and Time display as (Default Scenario Type) and (Default Time) respectively.
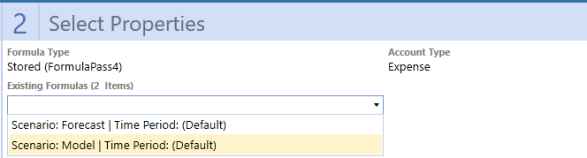
Select the scenario and time to apply to the formula.
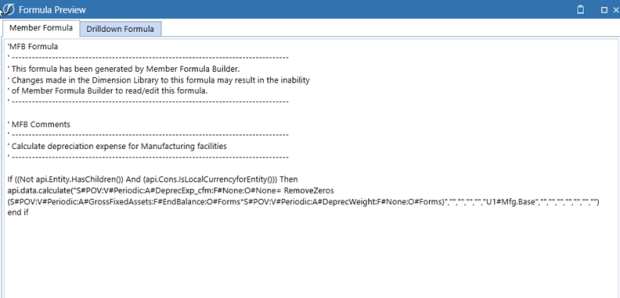
If there is already a formula associated with the member, you can preview the formula before making any changes. Click Preview to display the existing formula.
You cannot edit a formula if it was created outside of the Member Formula Builder. Users with the Administrator role can edit formulas created outside of the Member Formula Builder in the Dimension Library. Click Dimension Library to go to Member Properties, where you can edit the formula.
Build the Formula
Use the Build Formula section to create a simple member formula.

Dimension Icons
When you select a dimension icon, the Select Member dialog box appears so you can select the appropriate member from the hierarchy.
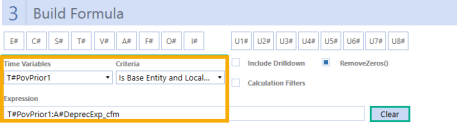
Time Variables
These are sample Time Functions that can be used to create a formula and were included for ease of formula creation. Items selected from this dropdown are added to the Expression. For more information on Time Functions, see the Design and Reference Guide.
Criteria
Defines the dimension to which the formula is applicable. If a criteria is selected from the dropdown, it does not show in the Member Formula text box but can be seen in the Preview dialog box.
Expression
This text box shows the selected dimensions or time functions selected. For stored formulas, the expression automatically populates for the member selected in the Select Member pane to help start the stored formula creation. Any text that is entered here can be cleared using the Clear button.
Clear
The Clear button is used to clear the Expression text box.
Add
There are left and right Add buttons which determine whether to place the expression before or after the Member Formula. Click the appropriate Add button to add the content currently in the Expression text box to the specified place in the Member Formula.
Calculation Filters
Only appears for stored formulas. This option lets you build calculation filters based on dimensions. Selecting this check box displays the Add Calculation Filters pane that lets you add filters that are calculated only if certain criteria are met.
To add a calculation filter:
-
Under Build Formula, select the Calculation Filters check box to open the Add Calculation Filters pane.
-
In the Add Calculation Filters pane, click on the desired dimension button. The Select Member dialog box displays.
-
Use navigation in the Hierarchy and Search tabs to select a member to which the calculation filter applies.
TIP: You can use the Select Member dialog box to select multiple members to which the calculation filter applies.
-
Click OK to close the Select Member dialog box and return to the Add Calculation Filters pane. Selected members are added to the calculation filter.
-
Select the expansion from the drop-down next to the selected dimension.

In the previous example, the formula first runs on the UD1 base members under the U1#Mfg.Base dimension. The calculation filter is added by selecting the U1# icon, then selecting the member from the Select Member dialog. The appropriate expansion is added by selecting from the drop-down.
Criteria defined in the text boxes are automatically saved and are part of the formula creation. You can see the calculation filters as part of your formula by clicking Preview.
Comments
Use this to include a description for the formula. When you preview the formula, you can also review the comments.
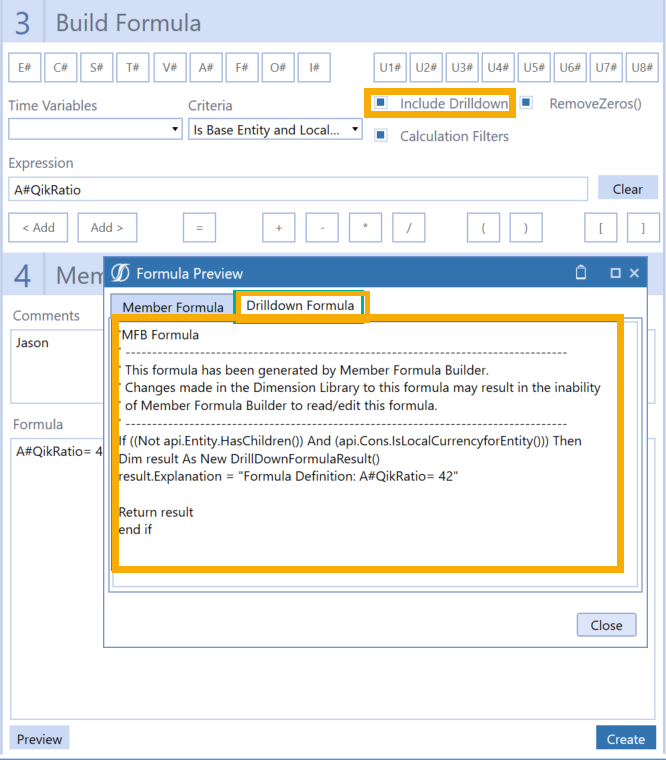
Include Drilldown
Selecting this check box allows drilldowns on the field for which the formula is being created. This also allows you to edit the drilldown formula, which displays in the Drilldown Formula tab of the Formula Preview.
RemoveZeros()
The RemoveZeros() function can be used to evaluate a source data buffer and remove all zeros in cells where the amount is zero whether or not it is flagged as a NoData cell. This function is important to use for performance purposes and therefore is enabled by default.
See also: The Design and Reference Guide for more information on the RemoveZeros() function.