Sample User-initiated Request
The following section illustrates how to set up a user-initiated request process starting from setting up the Request Profile to committing the change to the Dimension Library.
In this example we will:
-
Add a new account and enrich it with a custom property.
-
Assign a validation to the custom property.
-
Update an existing description and move the member to a new parent.
-
Approve the request with a read-only layout.
-
Commit the request to the OneStream Dimension Library.
The following assumptions apply to this example:
-
We have OneStream security groups called ACM_Requesters, ACM_Enrichers, and ACM_Approvers.
-
The ACM Test Mode is set to True.
-
We have an Account hierarchy called CorpAccounts in the Houston cube.
Set Up a User-initiated Request Profile
-
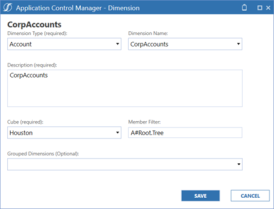
Go to Administration > Dimensions. Click the New icon to open the editing page.

-
Select CorpAccounts in the Houston cube .
-
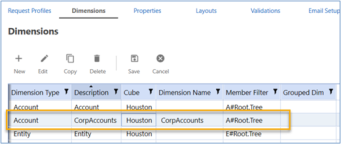
Click the SAVE button, and you should see the changes saved in the Dimension grid. Dimension setup is now complete.
-
Go to the Properties page to create the custom property for use in the enrich step. Click the New icon to open the editing page.

-
We are going to create a custom property named Effective Date with a default date format of mm/dd/yyyy. After we create the layout, we will assign a validation to this property.
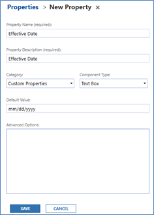
Creating a custom property is now complete.
-
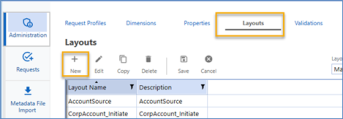
Navigate to Layouts and click on the New icon to open the editing page. We are going to create three different layouts, one for each of the steps.
-
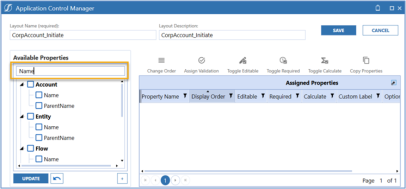
First we will create a layout for the requester to input the changes. Give the layout a unique name and description. Then, in the Filter field, enter the first property (Name) to search for it instantly.
-
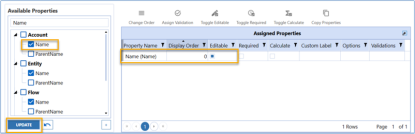
Select the check box next to the Name property, then click the UPDATE button, and you should see the property move to the Assigned Properties grid on the right.
-
Repeat steps seven and eight to continue adding properties to the layout.
TIP: You can select multiple properties in the Available Properties list and then click the UPDATE button to move all selected properties to the grid at one time.
-
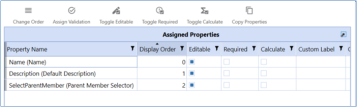
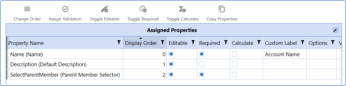
To make the Name and Parent Member properties a required field, select the check box in the Required column. We also want to give the custom label name of Account Name. Click theSave button and it should look like this:
-
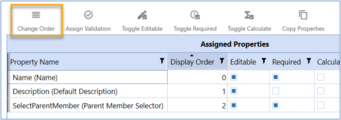
Now we want to move the Description to the last position. Click on the Change Order icon to open the editing page.
-
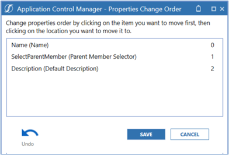
Click Description and then SelectParentMember and you will see their positions swap. Click the SAVE button to close the window.
-
Click the Save icon to save the layout. Navigate to the Layouts page and you should see CorpAccount_Initiate in the grid.

-
Now we will create a layout for the Enrich step. Follow previous instructions to open a new Layout editor page.
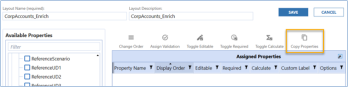
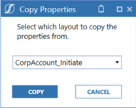
This time we will use the Copy Properties feature to quickly copy the same properties from the CorpAccount_Initiate layout.
-
From the Copy Properties dialog box, select the CorpAccount_Inititate layout. Click the COPY button and you should see the properties copied over in the Assigned Properties grid.
-
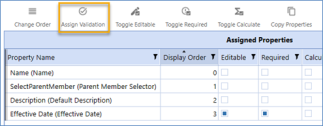
Add the Effective Date custom property to this enrich layout. To protect data integrity, we also want to prevent the enricher from changing values that the requester has input. Make the properties un-editable by clearing the Editable check box.
The result should look like this:
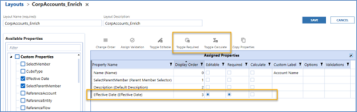
TIP: Use the Toggle Editable and Toggle Required to quickly select all check boxes.
-
Now we will assign the Check Date Format validation (which is a pre-installed validation) to the Effective Date. In the grid, select the Effective Date property, then click the Assign Validation icon to open the assign window.
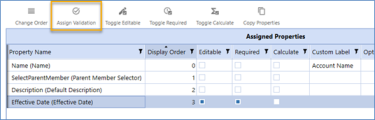
-
Select the check box next to CheckDateFormat and click the ADD button to move it to the Assigned Validations pane. Close the window and you should see the Validations column in the grid updated.


Click the Save button and the Enrich layout is now complete.
-
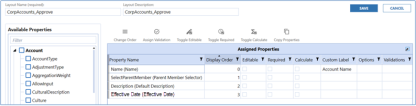
Next, repeat previous steps and create a read-only layout for the Approve step. The result should look like the following image. Save the three layouts.
-
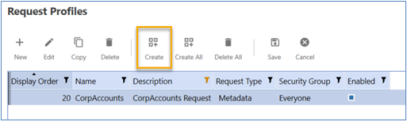
Next, navigate to the Request Profiles page and click the New icon to open the editing page.
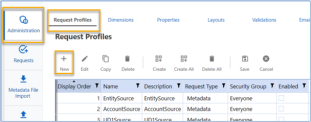
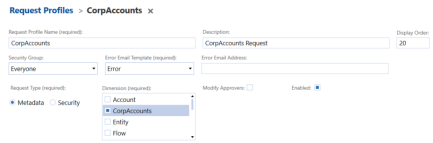
-
Here we will name the profile CorpAccounts, with a description of CorpAccounts Request. The request type is Metadata and the Dimension is what we have set up, CorpAccounts. Select the Enabled check box to make it visible for the user to select.
-
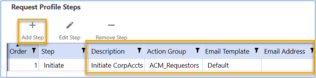
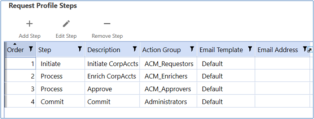
On the Request Profile Steps grid, change the description for the Initiate step and the action group as needed. Then, click the Add Step icon to open the editing page.
-
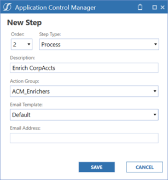
The next step in the request is Enrich. We will select the step type, Process, and type the description Enrich CorpAccts. Set the Action Group to the appropriate security group. Click the SAVE button.
-
Repeat the previous step and add the Approval and Commit steps. The result should look like this:
-
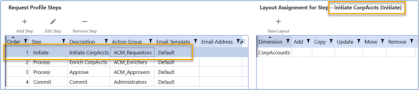
Next, in the grid, select the Initiate step. On the right-side pane above the Layout Assignment grid, you should see the title change to Initiate CorpAccts (Initiate).
-
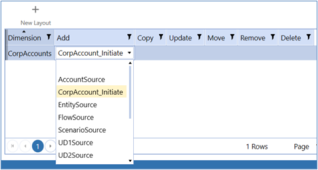
Since we want to allow Add, Update, and Move for this profile, we need to assign a layout to these actions to activate them. Click the Add column cell to open a drop-down list. Select the CorpAccounts_Initiate layout that we just created.
-
Assign the same layout to Update and Move actions. Make sure to click the Save button before you continue. The result should look like this:

-
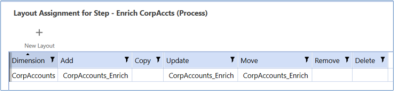
Select the Enrich step, and assign the enrich layout to the same Add, Update, and Move actions.
TIP: Check the title to confirm you are on the correct step.
-
Repeat the process to assign the layout to the Approve step.

-
Save the Request Profile and navigate to the Request Profile page. Select the CorpAccounts Request line and click the Create icon to generate the dynamic dashboard. The request profile setup is now complete.
Create a User-initiated Request
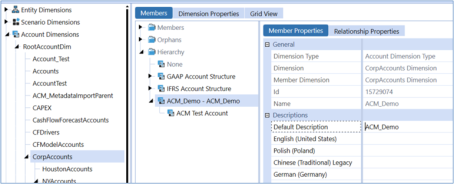
This is the current hierarchy for our CorpAccounts:
Our objectives in this exercise are to submit a single change request with the following three line items:
-
Create a new parent called Sample Parent under ACM_Demo and create a new child called Sample Child under this new parent.
-
Move the ACM Test Account under the new Sample Parent.
-
Update the description of ACM_Demo to Demo Account Hierarchy.
-
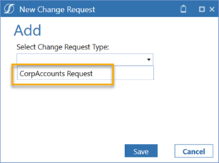
On the left navigation panel, select Requests and click the Create icon. A window will open. Select CorpAccounts Request and click the Save button.

-
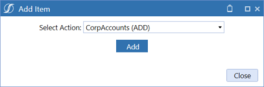
On the Request Detail page, click the Add icon and select CorpAccounts (ADD).

-
The properties display in the Item Detail section.
TIP: If there are no properties showing, make sure you have clicked on Create on the Request Profile page to generate the dynamic dashboard.
Input the values and click the Save icon.
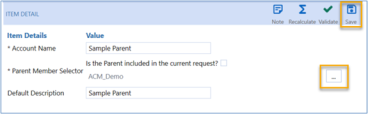
TIP: Click the ellipsis to open the Member Selector window.
-
The item grid should be refreshed and the first line item is displayed.

-
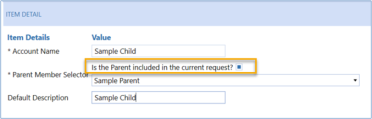
Next, we will add the Sample Child member. Click Add and select CorpAccounts (ADD) again. Since ACM_Demo is a new parent, we will select the Is the Parent included in the current request? check box.
Click Save to save the line item.
-
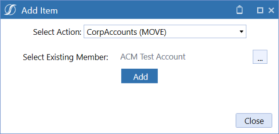
Next, click Add and select CorpAccounts (MOVE). Select the member ACM Test Account and click the Add button.
-
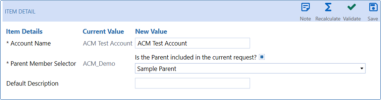
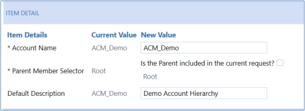
In the ITEMDETAIL, you should see the Current Value and the New Value columns. Select the Is the Parent included in the current request? check box and change the new parent to be Sample Parent.
Click the Save icon to save the line item.
-
Next, click Add and select CorpAccounts (UPDATE). Change the description for ACM_Demo to be Demo Account Hierarchy.
-
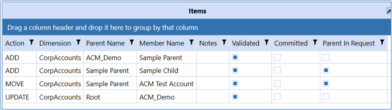
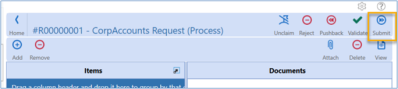
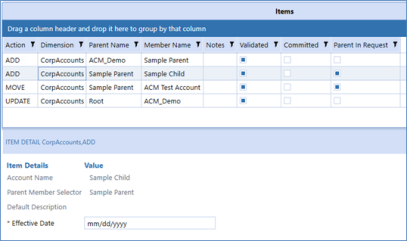
The Items grid should look like this. Click the Submit icon to go to the next Enrich step.
-
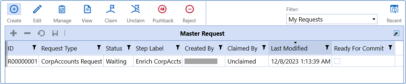
You should now be on the Request Home Page and the request status and step label should be changed to Waiting and Enrich CorpAccts. The Initiate step is now complete.
-
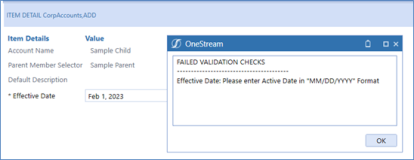
As an Enricher, select the request and select Manage to open the Request Detail page. Select the new member Sample Child line item and you should see the Effective Date property in the ITEM DETAIL section. Notice the other properties are not editable.
-
To test the date format validation, type Feb 1, 2023 in the box and click Save. You should receive an error message.
-
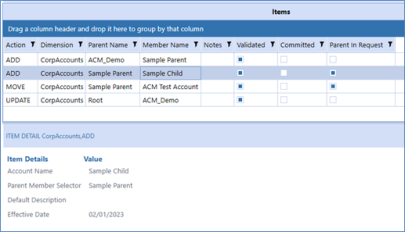
Now enter 02/01/2023 and click Save again. It should save this time. Click Submit to proceed to the next Approval step.
-
The request status and step label have now changed to Waiting and Approve.

-
As an Approver, select the request and click Manage to open the Request Detail page. Notice all properties are now read-only. Click Submit to proceed to the next step.
-
The request status and step label have now changed to Waiting and Commit. Notice the Ready to Commit is selected by default. As an Administrator, click the Commit icon on the home page to commit the request.

-
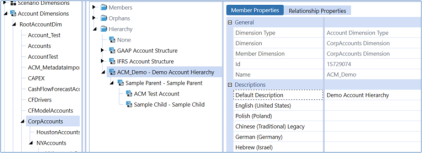
Finally, navigate to Application > Dimension Library and you should now see your changes reflected in the CorpAccounts dimension. The change request process is now complete.
Tips
After you familiarize yourself with the various administration components needed to complete a Request Profile, there are some tips to make the setup process even easier with fewer clicks.
-
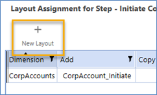
Instead of going to the Layouts page to create a new layout, you can create a layout on the Request Profile editing page using the New Layout icon.
-
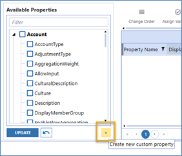
Rather than using the Properties page to create a new custom property, you can do so directly on the Layout editing page. Use the + icon at the bottom of the Available Properties pane to open the properties editing page.
-
On the Layout editing page, you can assign a validation to a property by clicking the Assigned Validation icon rather than going to the Validations page to do the assignment.