Report Setup
Use the Report Setup page in Application Reports settings to:
-
Set security access by user role for report groups and individual application reports.
-
Set the order in which report groups and their respective reports display in the Report Groups and Reports panes of the Report Viewer page.
See also: Report Viewer Page.
-
Customize Report Overview descriptions.
Set Security Access for Report Groups and Reports
You can use the Report Setup page to manage who has access to specific report groups and individual reports within report groups. Use the Report Groups pane to set security access for report groups. Use the Reports pane to set security access for reports in the currently selected report group. If a user does not have security access to a report group, they do not see that report group or its reports in the Report Groups or Reports panes of the Report Viewer page.
See also: Report Viewer Page.
To set security access for report groups or individual reports:
-
In the Report Groups pane of the Report Setup page, click to select a report group. This loads information for the group’s reports in the Reports pane.
-
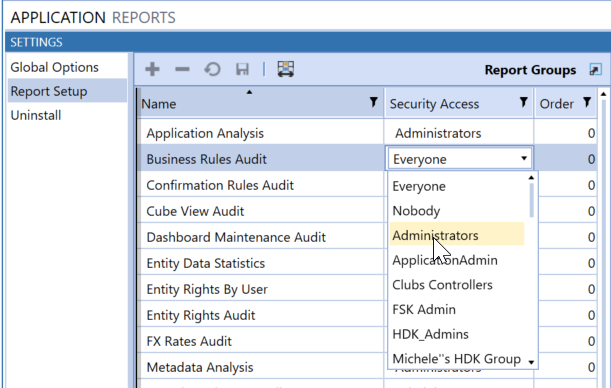
Click the row of the report group or report whose security access you want to change, then click in the Security Access column to enable the Security Access drop-down.
-
Select a Security Access group from the list, as shown in the following.
-
Click Save in the Report Group button bar to save your changes.
Based on these security access settings, report groups and associated reports display to users.
NOTE: Report level security does not override report group level security. If a user has access to a report but not its report group, neither the report nor the report group is visible.
Set Reports Groups and Reports Display Order
You can also use the Report Setup page to manage the display order of report groups and reports in the main Standard Application Reports dashboard. This is done by modifying ranking entries in the Order field for the report groups and reports and saving the changes. The lower the number, the higher the sequential display ranking, starting with zero. If a display order is not set, report groups and reports display alphabetically.
To set display order for report groups or individual reports:
-
In the Report Groups pane of the Report Setup page, click to select a report group. This loads information for the group’s reports in the Reports pane.
-
Click the row of the report group or report whose order you want to set, then click in the Order column to highlight the current order value for editing.
-
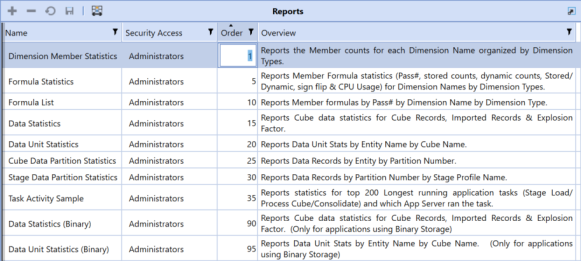
Enter a number to set the sequential ordering of the report group or report within the report group or report order. For example, the following shows a report given an order of 1, which is the lowest order number for all the reports in the group, so it would appear first in the report display order.
-
Click Save in the Reports button bar to save your changes.
Customize Report Overview Descriptions
Use the Report Setup page to manage the report descriptions in the Overview field of the Reports pane. To do this, click the overview description you want to change, then double-click in the cell to edit the description. After editing the description, click Save to update the report description.
Report Groups and Reports Panes Button Bar

Insert Row
This button is disabled for Standard Application Reports.
Delete Row
This button is disabled for Standard Application Reports.
Cancel
Removes changes made to the report groups or reports since the last save.
Save
Save changes to report groups or reports.
Column Settings
Allows you to select the columns to display in the Report Groups and Reports panes of the Report Setup page.
See also: Hide and Show Columns
Show and Hide Columns
Click Column Settings to specify the columns you want to view in the grid.
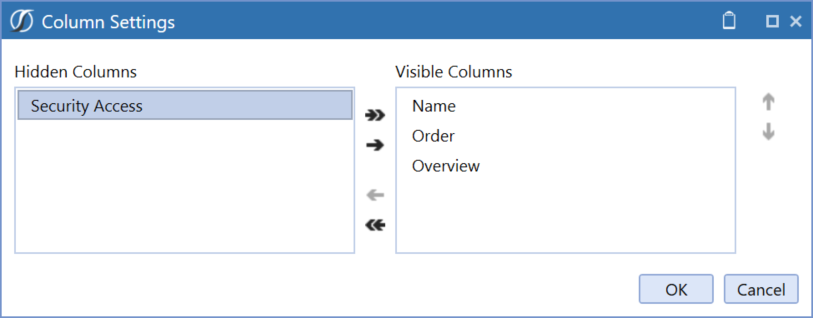
Select column names in either the Visible Columns list or the Hidden Columns list and use the left-to-right and right-to-left arrows to move the selected columns from one list to the other. You can hold down the SHIFT key to select multiple sequential columns, or you can hold down the CTRL key and select multiple non-sequential columns.
Use the Add All Items or Remove All Items arrows to move all columns from one list to the other.
The Visible Columns list shows the order in which columns display. To reorder a column in the display, select the heading name from the Visible Columns list, then use the Move Up and Move Down buttons to set where the selected column displays.