User List – Grid View
The User List – Grid View Report shows all information about all user records in a grid. Use grid features to create a highly customized report that shows exactly which user records you want to see, what data you want to see, and how you want to see those user records grouped.

Manage Grid Items
The grid in the User List - Grid View report provides several features that let you group, filter, and display the data, items and columns in the grid.
Group Grid Items
In User List - Grid View report grid, you can drag and drop column headers to the dark blue bar on top of the column headers to group and display grid items by the dropped column.

Any column or combination of columns can be used. For example, to group by the user and whether the user is enabled in the system, first drag the User column head up to the bar at the top of the grid, then do the same with the IsEnabled column head. Dragging and dropping any column head to this area changes it to the Grouped by bar and displays the column head names that you drop into it.
The following image shows the grid in the User List - Grid View report with the tasks grouped first by the IsEnabled column value (which returns False or True), then by the Updated By column value. Grouped list items display in alphabetical order.
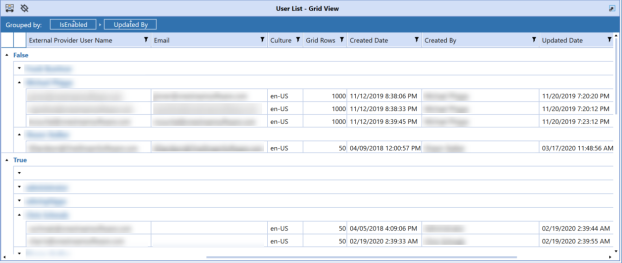
Column groupings are updated and display as soon as the column is dropped into the bar. When more than one grouping is used, groupings display as nested within its higher-level grouping. For example, the previous image lists the users by whether the user is enabled in OneStream, then within each status, users are grouped by the date the user’s record was updated.
Expand or collapse grouped items by clicking Expand and Collapse on the top left of each grouping.
Any column groupings you make are retained between Security Audit Reports sessions. Groupings stay in place until you change them or remove them.
To remove a grouping, hover over the column group you want to remove, then click the x that appears in the group box. You can also click the column group head in the Grouped by bar and drag it anywhere outside of the bar to remove it. Removing all groupings restores the list to its original state.

You can also change the list of items within groupings between ascending order and descending order by clicking the ascending/descending widget on the top of the column group box.
When grouping grid items by multiple groups, you can also easily change grouping hierarchy by dragging and dropping a grouping box to the desired grouping level.

Filter Items that Display in a Grid
Grids allow you to use filters to display a subset of the grid’s items. This is useful when working with large numbers of items in a grid and lets you easily focus on the items you need to work with.
Any column reordering stays in state until you change it. In other words, column ordering is remembered and retained from session to session until changed.
Any grid with columns that include the Filter  button in the column head let you use filtering criteria to display the items that meet the filtering criteria you define for that column.
In any grid column, you can click the Filter button to display the Filter Criteria dialog box.
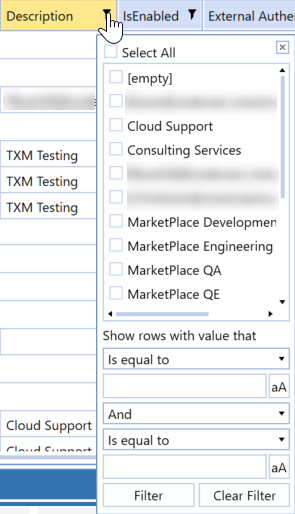
Start by selecting the specific items to include in the filter. Items that you can choose from are based on specific item values available in the selected column. You can select all items, specific items, or a single item for filtering.
Use the remaining fields to optionally build a filter expression to further filter the items to display in the grid. Use the fields to define the logical operators and relational operators in the filter expression. When a logical operator requires a value, use the text box below the logical operator list box to enter the value. Click the button next to the value if you want case matching to apply to the entered value.
Click Filter to apply the filter to the selected task group or task list.
Set and Order Grid Columns
You can click the Column Settings button to determine which columns to display and the left-to-right order in which the columns display in the User List – Grid View report. This allows you to easily focus on just the data you need to see.
The Column Settings dialog box lets you select the columns to display in the Task Groups and Tasks panes of the Task Administration page.

Select columns names in either the Visible Columns list or the Hidden Columns list and use the left-to-right and right-to-left arrows to move the selected columns names from one list to the other. You can hold down the SHIFT key to select multiple sequential column names, or you can hold down the CTRL key and select multiple non-sequential columns names. Then use the arrows to move the selected column names from one list to the other. Use the Add All Items or Remove All Items arrows to move all items from one list to the other.
The Visible Columns list shows the order in which columns display. To reorder a column in the display, select the heading name from the Visible Columns list, then use the Move Up and Move Down buttons to set where the selected column displays.