OneStream IdentityServer Setup and System Configuration
To manage identity providers, you must:
-
Work with the Cloud Operations team to configure users and environments for OneStream IdentityServer. See Onboarding Process and Considerations and Best Practices.
-
Have group-based access to the system security role to manage identity providers. See Required System Security Role.
By default, the system configuration is enabled for the feature to manage identity providers. If you need support with the system configuration, submit a Support ticket.
Required System Security Role
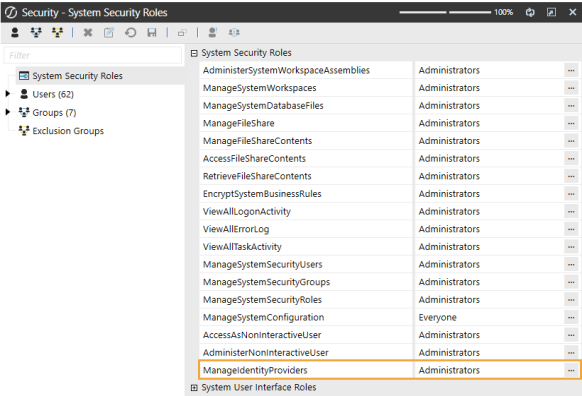
You need group-based access to the ManageIdentityProviders system security role to manage identity providers. By default, the Administrators group is assigned to this role.
To assign the required role to a group, you must have the ManageSystemSecurityRoles role. To add users to an existing group, you must have the ManageSystemSecurityGroups role.
See:
-
Managing Users and Groups in the Design and Reference Guide.
Apply Security Role
The following instructions provide an example of applying security roles. This may be configured differently depending on your security needs.
Assign the ManageIdentityProviders role to the users who will manage identity providers. Ensure the users are in the appropriate group, then assign the group to the role.
-
If one does not exist, create a group to which you will add all users who will work with identity providers. Otherwise, go to step 2.
-
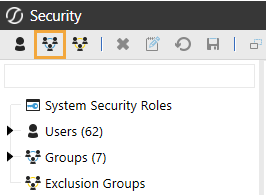
Go to System > Administration > Security.
-
Click the Create Group icon.
-
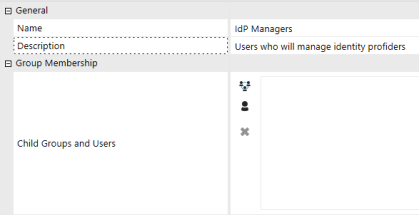
Enter a group name and description that reflects how users will work with identity providers. For example, use IdP Managers as the group name for users who will manage identity providers, and assign the ManageIdentityProviders role.
-
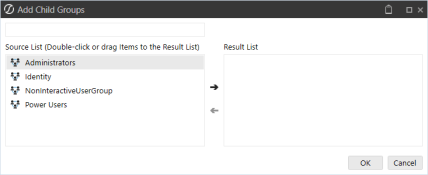
In Group Membership > Child Groups and Users, click the Add Child Groups icon or the Add Users icon to include the users or groups of users who will manage identity providers.
-
Click the Save icon.
-
-
Click System Security Roles, and then click the ellipsis next to ManageIdentityProviders.
-
Select the group containing the users who will manage identity providers.
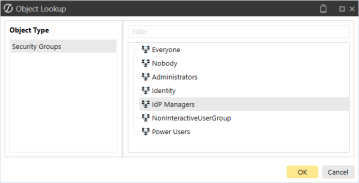
-
Click the OK button, then click the Save icon.
See Managing Users and Groups in the Design and Reference Guide.


