Cube views are the primary reporting tool in OneStream to display financial data for your organizational needs. You can also use cube view reporting in the Spreadsheet and Excel Add-in using cube view connections.
Define Cube View Connections
Cube view connections are different from exporting a cube view to Excel because the connection remains live, meaning data can be refreshed and submitted.
Before defining cube view connections:
-
Make sure you have the appropriate security settings to access your Cube View and the Spreadsheet page in OneStream.
-
Make sure your cube view is in a group within a profile that has visibility set for Excel.
-
If using the Excel Add-in, connect to OneStream. In Excel, from the OneStream menu, click Logon.
To add a cube view to Excel or Spreadsheet:
-
Select the cell that you want to place the cube view on. The uppermost left corner of your cube view will start on the cell you have selected.
-
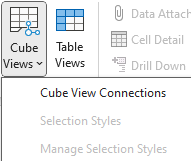
Select Cube Views > Cube View Connections > Add from the OneStream ribbon.
Configure Cube View Connections
You can configure cube view connections in OneStream from the Spreadsheet functionality.
-
Click OneStream from the Spreadsheet ribbon.
-
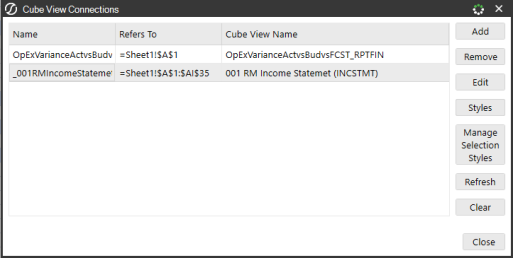
From Cube Views, select Cube View Connections to open the cube view connections dialog box.
Add a Cube View to Excel or Spreadsheet
-
Click Add to create a cube view connection.
-
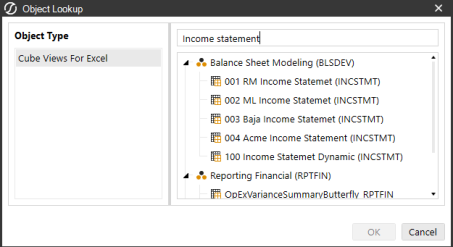
Click the ellipsis next to the Cube View field to open the Object Lookup dialog box. Object Lookup enables you to search for an existing cube view.
-
Use the Filter box to search for the name of the cube view and select it from the list of results.
-
Click the OK button to confirm the cube view selection.
-
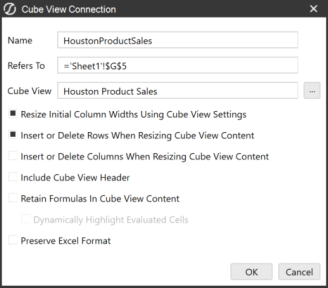
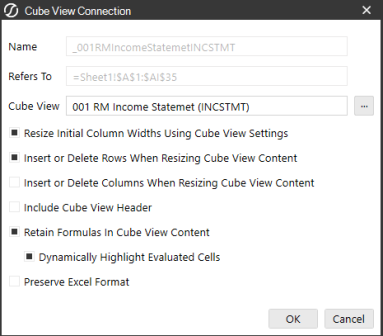
The Name and Refers To fields automatically populate for the selected cube view. Click the OK button to continue.
-
Click Close to exit the dialog box. Your selected cube view is now added to the spreadsheet.
NOTE: Refer to the table below for more context on these properties.
| Property | Description |
| Name | The name is created for you if you select the cube view first. If you type a name first and then select the cube view, the typed name is retained. |
| Refers To | This setting refers to the initial cell in your spreadsheet that your cube view will start on. This becomes the default cell for the cube view connection. |
| Cube View | Click the ellipsis to look up and add a cube view to make a cube view connection with. |
| Resize Initial Column Widths Using Cube View Settings | Selected by default, this option automatically resizes column widths based on the settings from the cube view selected. |
| Insert or Delete Rows When Resizing Cube View Content | Select this option if you plan to stack everything vertically on your worksheet. This automatically adds or deletes rows as a cube view expands and contracts. |
| Insert or Delete Columns When Resizing Cube View Content | Select this option if you plan to stack everything horizontally on your worksheet. This automatically adds or deletes columns as a cube view expands and contracts. |
| Include Cube View Header | This option includes the header on the cube view. |
| Retain Formulas in Cube View Content | This option allows you to enter formulas in the cube view (Excel or Spreadsheet) and retain those formulas before and after submission of the sheet or workbook. |
| Dynamically Evaluate Highlighted Cells | This option is only available if the previous option is selected. This highlights a cell if the formula reference has changed without having to refresh a spreadsheet. |
| Preserve Excel Format | This option enables you to preserve native Excel formatting changes made to Cube Views, Quick Views, and Table Views. When enabled, formatting changes made via native Excel formatting will be retained. |
Format Cube View Connections
In a spreadsheet, you can apply standard formatting to a cell, a group of cells, or to a row or column.
You can check the Preserve Excel Formatting setting in the Cube View Connection dialog box, or use Selection Styles and Named Ranges to format a cube view connection in a spreadsheet.
Manual Format Example - Selection Styles
-
Highlight a section of a cube view. In this example, cells A2:D3 are highlighted.

-
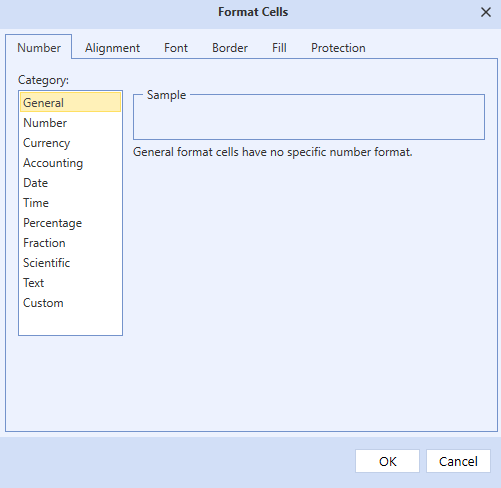
To change the background color, right-click on the highlighted cells and select Format Cells. The Format Cells dialog box is displayed.
-
Click Fill.
-
Select a color and click OK.

After the formatting displays, you can save this background color as a selection style. You can also add styles to apply changes to rows, columns, or cells, or a combination of existing styles with new styles. There are also options to apply conditional formatting.
Creating a Selection Style
-
Format selected cells.
-
To save formatted cells for the cube view connection, select Cube Views > Selection Styles.
-
Name the style.
-
From Range, choose Selection.
-
Click the OK button to save the selection style.
You can apply this style to existing cells by selecting the style. You can enable and disable styles from the Cube Views > Manage Selection Styles drop-down. See Selection Styles for Cube Views.
Named Ranges Example
Styles can be updated for a specific named range on a cube view in Spreadsheet.
-
From Cube Views, select Cube View Connections.
-
Select a connection and then click Styles .
-
Select the drop-down in the Style column of the named ranged you want to change. Choose your preferred formatting and then click the OK button.

-
Click the Close button.


