Azure AD (Microsoft Entra ID) Configuration
To enable single sign-on with Azure AD (Microsoft Entra ID) for the OneStream Desktop application, which includes the Windows Client application and the Excel Add-In, using OIDC protocol, see the Installation and Configuration Guide.
Configure the REST API Application Registration in Azure AD (Microsoft Entra ID)
To configure the REST API application registration, you need to copy the application (client) ID from Azure AD (Microsoft Entra ID) and paste it into the Web Server Configuration in OneStream.
-
Log in to your Azure AD account.
-
On the Home screen, click the App registrations icon.
-
On the App registrations page, click the + New registration tab.
-
On the Register an application page, complete the following fields:
-
Enter a name for the application.
-
For Supported account types, select Accounts in this organizational directory only.
-
-
Click the Register button.
-
On the page for the application, in the Manage list on the left, select Authentication.
-
In the Advanced settings, under Allow public client flows, set the Enable the following mobile and desktop flows option to Yes.
-
Click the Save button.
-
In the Manage list on the left, select Certificates & secrets.
-
In the Client secrets tab, click + New client secret.
-
In the Add a client secret dialog box, enter a description and select an expiration time in the drop-down menu. Click the Add button.
-
On the Certificates & secrets page, copy the value for the client secret.
IMPORTANT: The client secret value may only be available to copy for a limited time, so copy it immediately after it is created.
-
In the Manage list on the left, select Expose an API.
-
In Scopes defined by this API, click + Add a scope.
-
In the Add a scope dialog box, the application ID URI is automatically generated. Click the Save and continue button.
NOTE: You can add a scope in this dialog box if needed.
-
On the Expose an API page, copy the application ID URI.
Set Up the Web Server Configuration in OneStream
-
Open the OneStream Server Configuration Utility application.
-
Go to File > New Web Server Configuration File.
NOTE: Alternatively, you can open an existing file to edit it.
-
In the Web Server Configuration Settings section, click the ellipsis to the right of Single Sign On Identity Provider.

-
In the User Name Lookup field, type aud to include this claim in the ordered lookups.
NOTE: The claim aud indicates the intended audience for the token.

-
Click the ellipsis to the right of Azure Identity Provider.

-
In the Azure Identity Provider dialog box, in the REST API Settings section, complete the following fields :
-
OneStream Web Api Client ID: Enter the application (client) ID from Azure AD. See Configure the REST API Application Registration in Azure AD (Microsoft Entra ID) step 16.
TIP: To view the application (client) ID in Azure AD, go to the page for the application and select Overview in the list on the left.
-
OneStream Web Api App Custom Scopes: Enter custom scopes, or leave as default (blank).

-
-
Click the OK button.
-
Save changes and reset IIS.
NOTE: Reset IIS after you save any changes to the Application Server Configuration or Web Server Configuration.
Configure the User in OneStream
-
In the OneStream Desktop application, go to System > Security > Users > <user>.
-
In the Authentication properties, complete the following fields for REST API authentication through Azure AD.
-
External Authentication Provider: In the drop-down menu, select the Azure AD configuration.
-
External Provider User Name: Enter the application (client) ID from Azure AD. See Configure the REST API Application Registration in Azure AD (Microsoft Entra ID) step 16.
TIP: To view the application (client) ID in Azure AD, go to the page for the application and select Overview in the list on the left.
-
-
Click the Save icon.
Azure AD (Microsoft Entra ID) Endpoints
We support v2.0 Azure AD endpoints.
-
On Manifest, find accessTokenAcceptedVersion.
-
Set the value to 2.

-
Click Save.
Set Up Postman Access Token Requests
-
Create a new POST request. Set url to https://login.microsoftonline.com/{Tenant Id}/oauth2/v2.0/token with tenant ID value.
TIP: To view the directory (tenant) ID in Azure AD, go to the page for the application and select Overview in the list on the left.
-
In the Authorization tab, select Basic Auth for type. In the Username and Password fields, enter the client ID and client secret from the application registration, respectively. See Configure the REST API Application Registration in Azure AD (Microsoft Entra ID) step 12.
TIP: To view the application (client) ID in Azure AD, go to the page for the application and select Overview in the list on the left.
-
In the Headers tab, enter the following keys:
-
Accept: application/json
-
Authorization: Basic
-
Content-Type: application/x-www-form-urlencoded
-
-
In Body, enter either option 1 or option 2:
-
Option 1:
-
grant_type: client_credentials
-
scope: {AppId Uri}/.default for machine to machine use case
-
-
Option 2:
-
grant_type: password
-
username: {Azure ad user name}
-
password: {Azure ad user password}
-
scope: {custom scope}
-
-
-
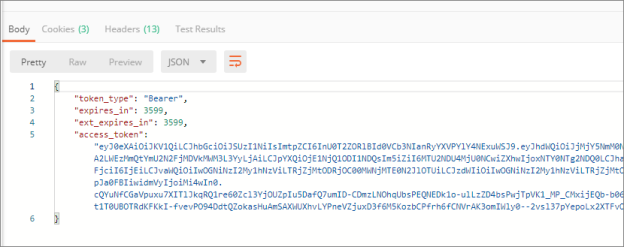
Click Send and notice the value of access_token in the response.