Pushing and pulling enables you to keep your local files and your OneStream files in sync. Performing a push replaces the items on the OneStream server with your local content. Performing a pull replaces items on your local machine with OneStream server content.
Pushing and pulling only impacts compilable files, such as C# or VB.NET files. If you have a non-compilable file in your local project, pulling from the server will not impact that file.
NOTE: Items with the status Conflicts or Errors cannot be pushed or pulled.
Before pushing or pulling, you can view a preview of the results and review changes, providing easy visibility into incoming and outgoing changes before you apply them. After an item is pushed or pulled, a results window displays a confirmation of the changes.
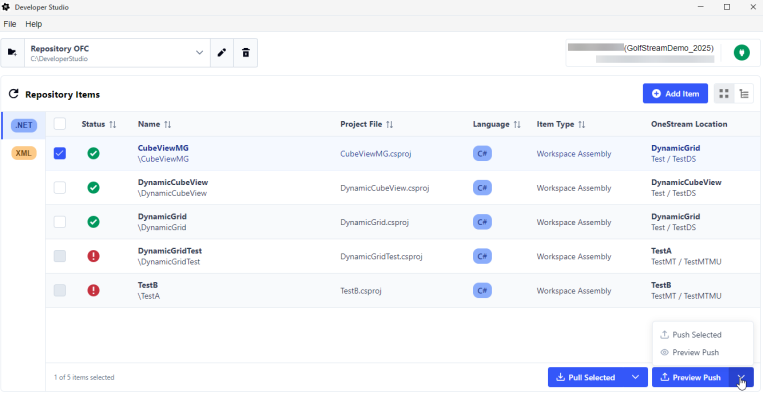
When you select the drop-down arrow for a push or pull operation, the Push/Pull Selected and Preview Push/Pull options display. The option you choose becomes the default for following push/pull operations until a different value is selected.
Push
To push your changes to OneStream, complete these steps:
-
Complete and save the changes in your local files.
-
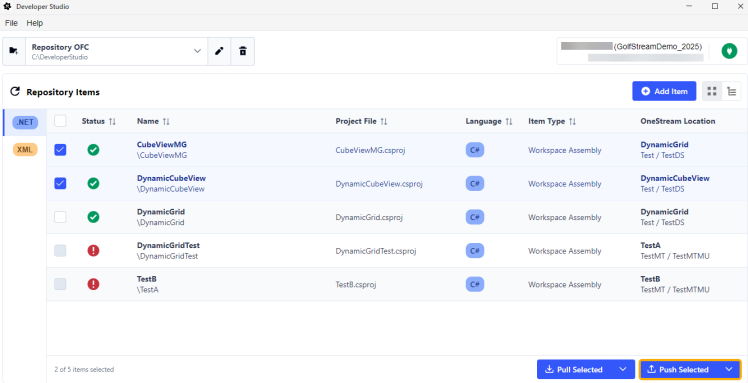
In the Repository Items grid, use the checkboxes to select the items you want to push. To select all items in the repository, select the multiselect checkbox.
-
Select your default push operation.
-
The Confirm Push Operation dialog box displays. To confirm that you want to replace items on the OneStream server with your local content, select the OK button.
To prevent the Confirm Push Operation dialog box from displaying again, select the Don't show this confirmation again for push and pull operations checkbox.
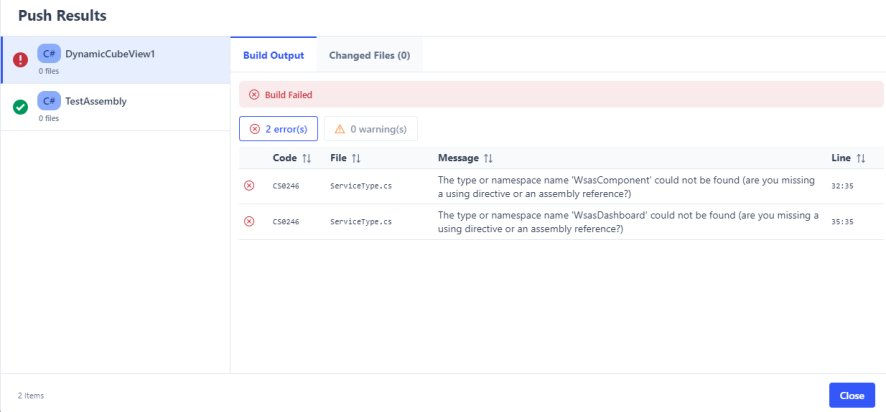
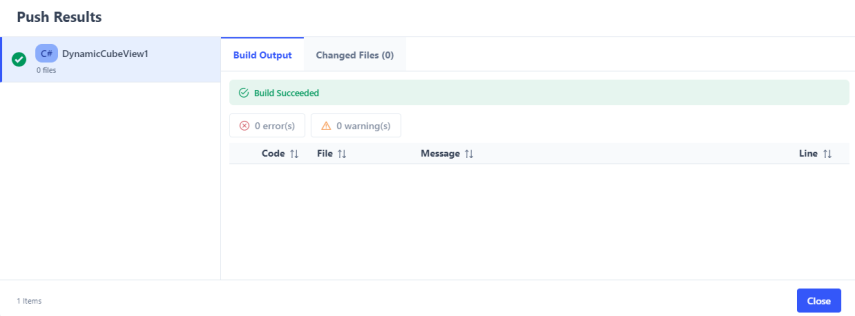
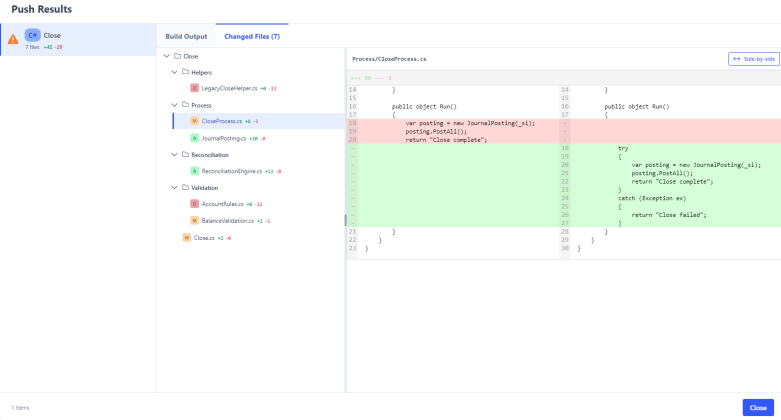
Once a push is completed, the Push Results window displays showing updates to the files. A push compiles on the server, and the Build Output tab displays compilation results
Pull
To pull content from OneStream down to your local, complete these steps:
-
Complete and save your changes in OneStream.
-
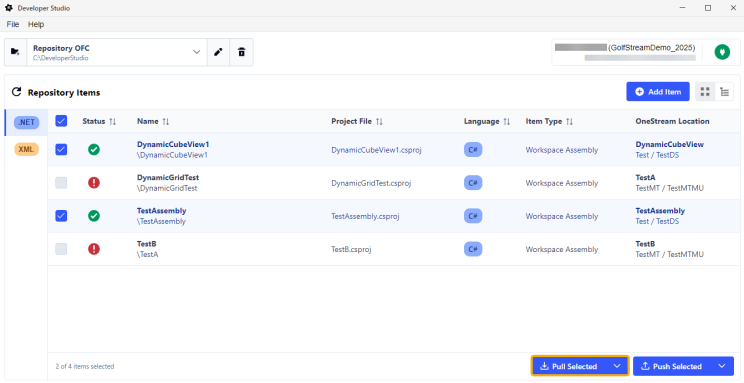
Use the checkboxes to select the items you want to pull these changes into. To select all items in the repository, select the multiselect checkbox.
-
Select your default pull operation.
-
The Confirm Pull Operation dialog box displays. To confirm that you want to replace items on your local machine with OneStream server content, click the OK button.
To prevent the Confirm Pull Operation dialog box from displaying again, select the Don't show this confirmation again for push and pull operations checkbox.
CAUTION: If you have added a file locally to any of the selected project items that have not been pushed to the server, performing a pull will delete this local file.
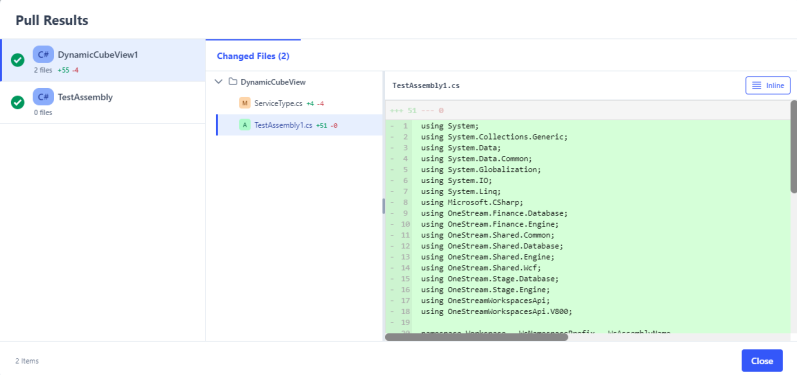
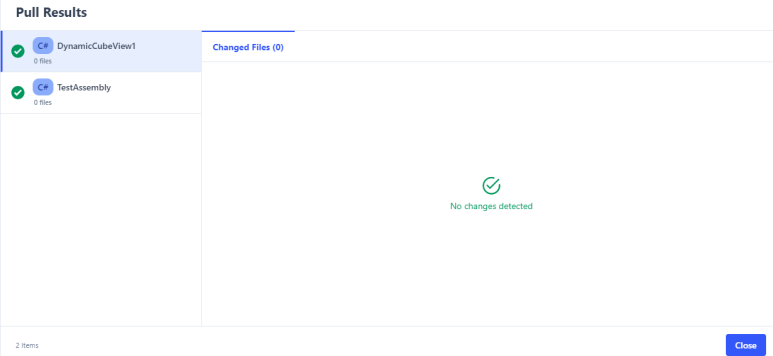
Once a pull is completed, the Pull Results window displays showing updates to your local files.
Previews and Results
The Preview and Results windows display all changed files and provide visibility into line-by-line changes before and after push/pull operations. The left pane displays each item selected for the push/pull operation.
In the Push/Pull Preview window, all items in this pane are selected by default. Use the checkboxes to deselect any items you want to exclude from the push/pull operation.
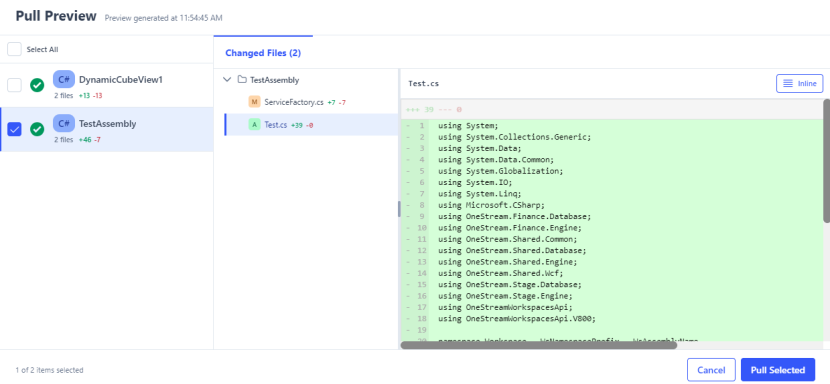
Each item displays with the following indicators:
-
Status
-
 Ready: The item is valid and ready to push and pull.
 -
 Conflicts: The item has conflicts with the server that must be resolved before you can push and pull.
 -
 Error: The item has errors that must be resolved before you can push and pull.
-
-
Item name
-
The languages of the project file, which can be C# or VB.NET.
-
The total number of files altered
-
The total number of lines added and removed
The Changed Files tab displays a tree view of changes for the items selected in the pane. Each file displays the total number of lines changed and a change-type indicator:
-
 Added: The file was added.
 -
 Deleted: The file was deleted.
 -
 Modified: The file was modified.
When a file is selected in the navigation tree, the file viewer pane displays the modified lines.
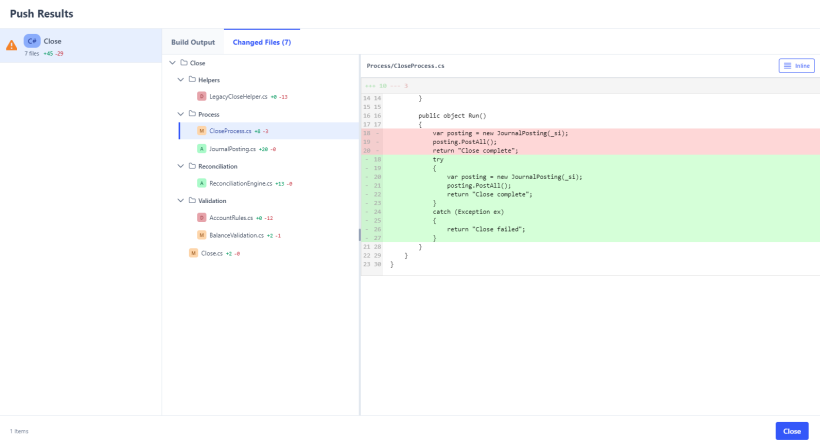
The file viewer defaults to an inline view. To display a side-by-side view, select the Inline button.
If there are no changes being pushed or pulled, the window displays No changes detected.
Push Results
A push operation compiles on the server, and the Push Results window displays the build output results with any errors or warnings. A banner displays above the grid indicating the compilation status. The grid shows the code for each error or warning, including the associated file and line/column number. You can filter the grid to display only errors or warnings.