The Templates page serves as the central interface for administrators to manage their Journal templates. You can create new templates, modify existing ones, and review all active templates in use.
Templates Grid
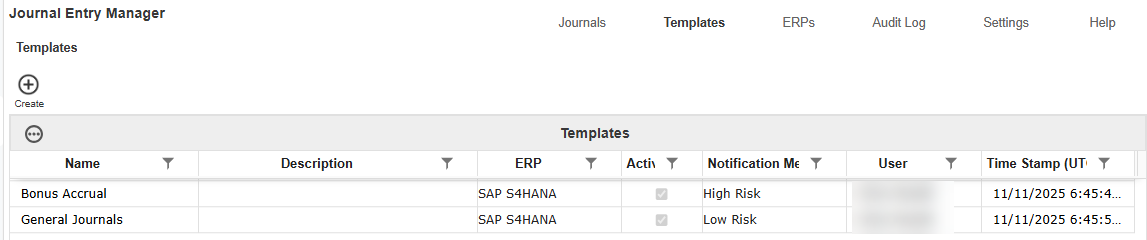
Once a Journal Template is created, the Templates grid displays these attributes:
-
Name: The designated name of the Journal Template.
-
Description: A brief description of the template purpose or intended use.
-
ERP: Indicates the ERP the template is linked to.
-
Active: Shows whether the template is active.
-
Notification Method: Specifies what notification method will be used to send notifications for journals created from the template.
-
User: Displays the user who last modified or created the template.
-
Time Stamp (UTC): Displays the exact date and time in UTC when the template was last created/updated.
Create Journal Template
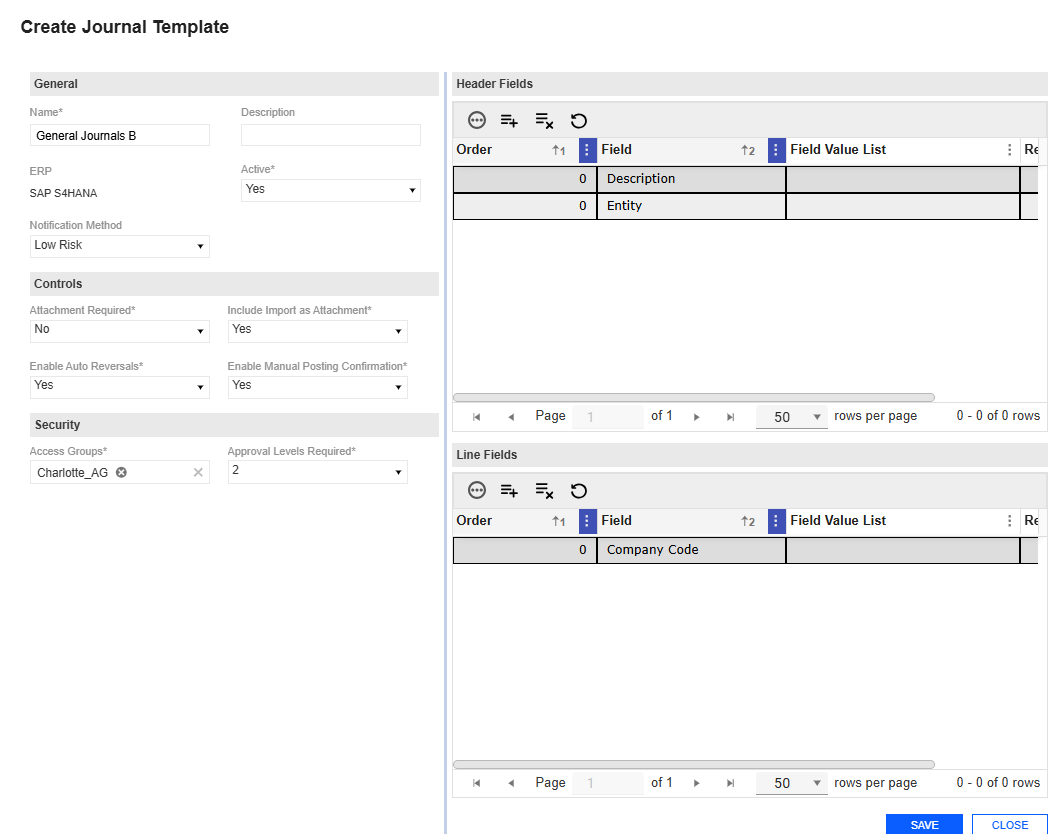
The Create Journal Template slide-out panel enables administrators to configure the attributes needed to create a template for a specific ERP system. When setting up a template, you must provide a template name and specify the relevant ERP.
After selecting the ERP and completing all required fields, the Create button displays additional options in the slide-out panel for choosing fields within the Header and Line Field areas that correspond to the selected ERP. This process ensures that the attributes assigned to the ERP's fields are maintained so that journals sent to the destination ERP can meet necessary validations.
You can also assign one or more Access Groups to the template to determine which users have permission to use it. When an end user creates a journal, they can only select templates associated with their access group. Administrators can set the number of Approval Levels Required, ranging from 1 to 4, for journals created using this template.
Example: If a template has an Approval Level Required set to 2, the journal will require 3 individuals, 1 preparer and 2 approvers.
This slide-out has validations that include:
-
ERPis required.
-
Name is required and must be less than or equal to 200 characters.
-
Description must be less than or equal to 250 characters.
-
Active is required.
-
Notification Method is optional.
-
Attachment Required is required.
-
Include Import as Attachment is required.
-
Enable Auto Reversals is required.
-
Enable Manual Posting Confirmation is required.
-
Access Groups is required.
-
Approval Levels Required is required.
-
Header and Line Item Fields are optional.
Create Journal Template
-
Go to Journals > Journals.
-
Click the Create button.
-
Complete the following General fields:
-
Name the template.
-
Select an ERP.
-
Enter a description (optional).
-
Under the Active drop-down menu, specify whether this Journal Template is active.
NOTE: Journals can only be created from active Journal Templates.
-
Under the Notification Method drop-down menu, select a method (optional).
-
-
Complete the following Control fields:.
-
From the Attachment Required drop-down menu, indicate whether an attachment is required.
-
From the Include Import as Attachment drop-down menu, indicate whether the attachments is automatically included as an attachment on the journal.
- From the Enable Auto Reversals drop-down menu, indicate whether reversal fields (Reversal Required, Reversal Period, Reversal Date) should display when creating journals from this template.
-
From the Enable Manual Posting Confirmation drop-down menu, indicate whether the confirm action is available, allowing Approvers that are assigned to this template to access the property.
-
-
Complete the following Security fields:
-
Select an Access Group.
-
From the Approval Levels Required drop-down menu, choose the required levels.
-
-
Click the Create button.
-
In the Create Journal Template slide-out panel, add line items for Header Fields and Line fields in the pane.
-
In the Header Fields panel, click the Insert Row button.
-
Enter values in the Order, Field, and Field Value List columns (optional), and indicate if it is Required.
-
-
In the Line Fields panel, click the Insert Row button.
-
Enter values in the Order, Field, and Field Value List columns. For each Line Item Field, you can set the required field on or off.
NOTE: Optional (non-required) fields will display as text boxes in the journal entry grid. Required fields will use the appropriate data type input such as date picker, number, and more.
-
-
Click the Save button.
Delete a Journal Template
-
Select an existing Journal Template.
-
Click the Delete Row button.
Edit Journal Template
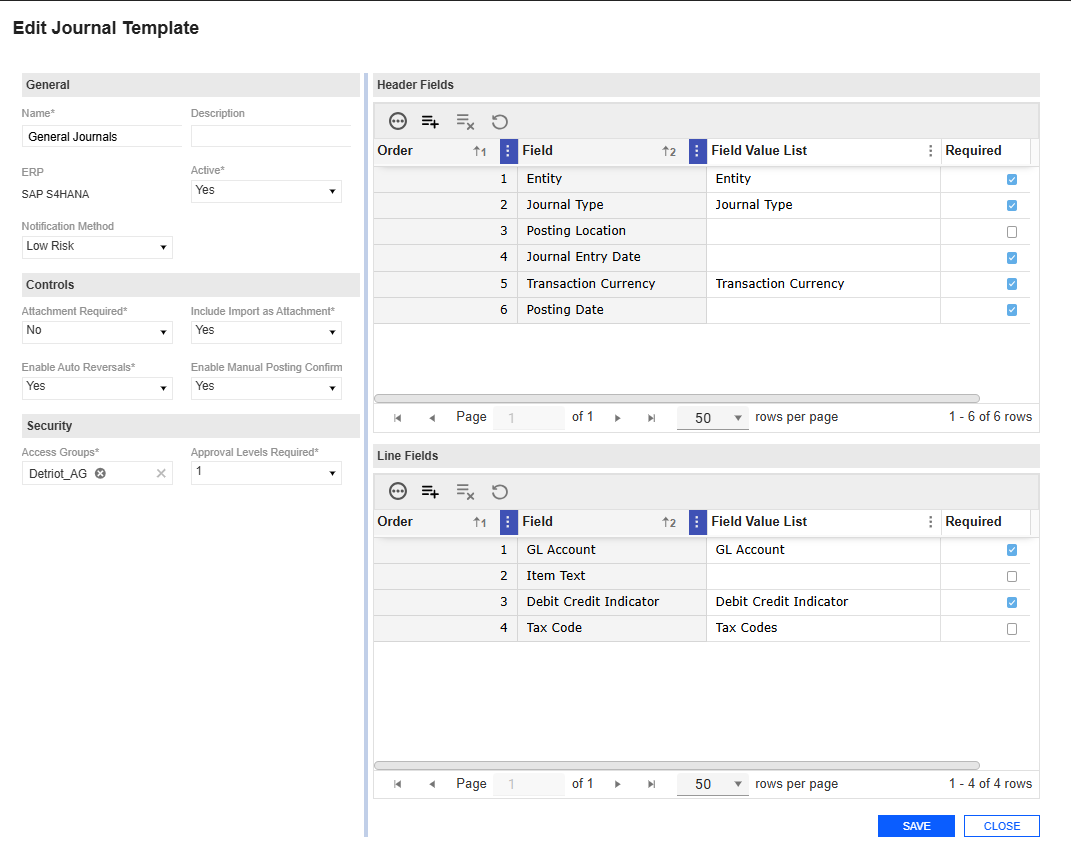
The Journal Template Edit slide-out panel enables you to modify existing templates. Any changes made to the templates will impact any journals not posted.
Example: If a field is added or removed from a template, that field will automatically be added to or removed from all associated journals not posted.
This has validations that include:
-
The Edit slide-out panel uses the same validations as the Journal Template Create slide-out panel. See Create Journal Template.
Edit Journal Template
-
Select an existing Journal Template.
-
Click the Edit button.
-
The Edit Journal Template slide-out panel displays the current inputs of the Journal Template selected. Make your changes.
CAUTION: Any changes made to the templates will impact in-process journals.
-
Click the Save button to save your changes.
Copy Journal Template
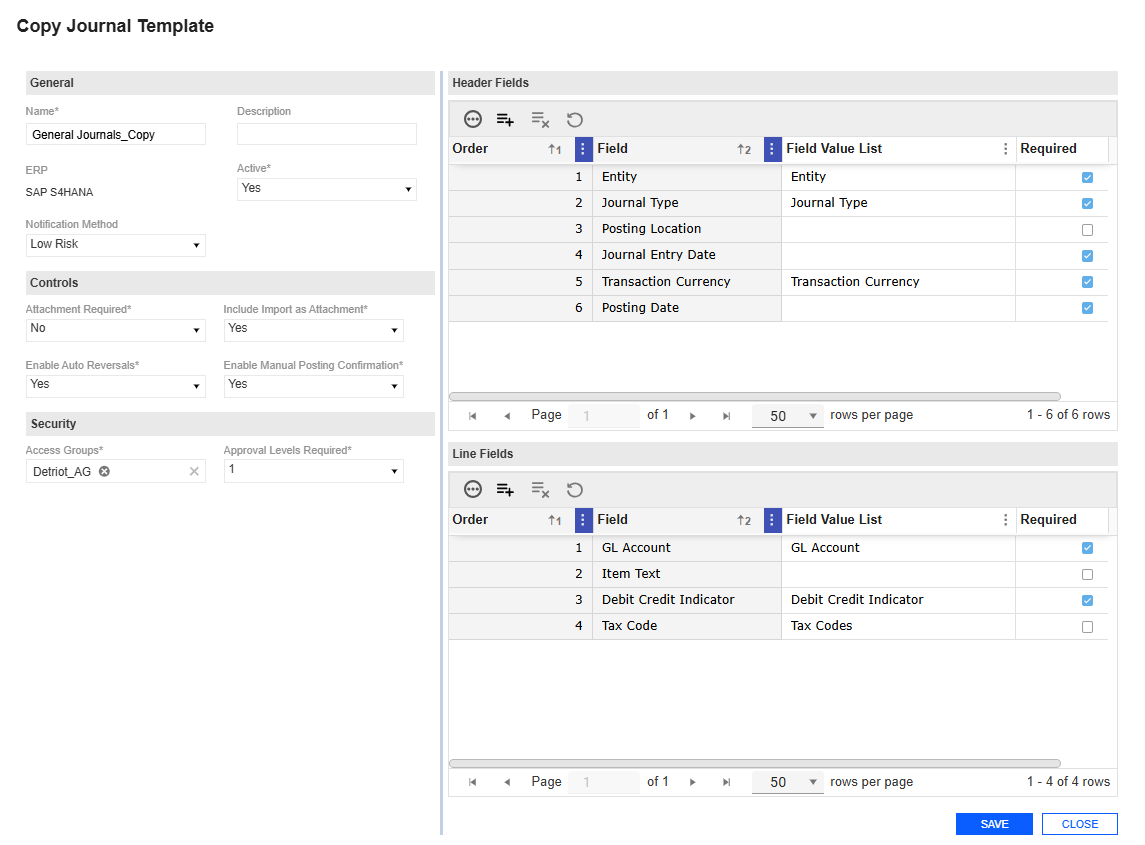
The Journal Template Copy slide-out panel enables you to duplicate an existing Journal Template and create a copy. Upon initialization, the Copy slide-out panel assigns the new template a name by appending _Copy to the original Template name, indicating that it is a duplicate. The name is not subject to a unique name validation until the Copy action is confirmed. All other fields are transferred and remain editable, except for the ERP field, as fields are associated with a specific ERP system.
Select a Journal Template and click the Copy button to display a slide-out panel with Copy and Cancel options. The new template is only created in the database once the Copy button is selected. If the Cancel button is selected, the slide-out panel will close without generating an additional template in the database.
This has validations that include:
-
The Copy slide-out panel uses the same validations as the Journal Template Create slide-out panel. See Create Journal Template.
Copy a Journal Template
-
Select an existing Journal Template.
-
Click the Copy button.
-
In the Copy Journal Template slide-out panel , the duplicate template contains the fields from the original template. Modify these fields as needed.
-
Click the Copy button.
-
In the Header Fields section, review and update any existing or copied fields as necessary.
-
In the Line Fields section, review and adjust existing or copied fields as necessary.
-
Click the Save button to apply your changes.


