Categories
Organize your snippets by creating categories and sub-categories. Categories and sub-categories align your snippets into logical groups for the current module type and let you customize their display in Snippet Editor.
The Module Type drop down contains a list of predefined snippet modules. Each module type is only available in specific areas of OneStream. Module types include:
-
General
-
Finance
-
Stage
-
CubeView
-
Dashboard
-
Extender
-
Event Handler
The following grid shows each module’s availability in the Business Rules and other areas of OneStream.

Categories and SubCategories Button Bar
Use buttons in the Categories and SubCategories panes to add, delete, and save category and sub-category entries. All created categories and sub-categories appear in the Category and SubCategory drop-downs on the Editor page, which lets you filter the list of snippets on that page.

See also: Editor
Insert Row - Add a new category or sub-category.
Delete Row(s) - Select a category or sub-category in the Category or SubCategory pane, then click Delete in that pane to delete the item.
Cancel - removes changes made to categories and sub-categories since the last save.
Save - Saves updated task groups.
Create Categories and SubCategories
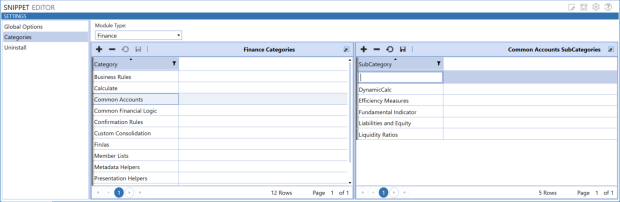
The Categories page includes a Categories pane and a SubCategories pane, where you can build out the category and sub-category relationships for the current module type:
-
In the Module Type drop-down, select the module type for which you want to create categories and sub-categories.
-
Click the Add button in the Categories pane to create a new row, then click the Category column in the new row to edit its contents.
-
Enter the name of the category you want to add and click Save.
-
Click Add in the SubCategories pane to create a new sub-category row, then click the SubCategory column in the new row to edit its contents.
-
Enter the name of the sub-category you want to add and click Save.
-
Repeat steps 2 through 5 to add additional categories and sub-categories.