After creating a journal, it can be managed through the Details, Comments, Attachments, and History tabs.
NOTE: To close any of the tabs below, click the Close button on each tab page.
Details
The Details tab displays all information entered during journal creation. See Journals Create and Edit.
Comments
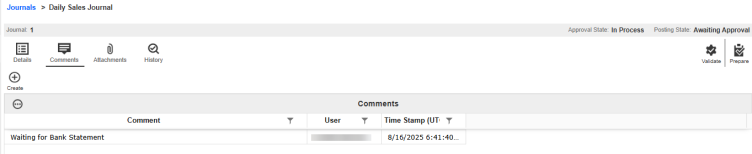
The Comments tab enables you to create and edit comments within a journal. In the Manage Journals page, you can access the Comments tab to view comments from different users and associated timestamps for when they were made or last modified. Comments can be added at any time. Comments can be edited or deleted until the journal is fully approved
Add a Comment
-
Go to Journals > Journals.
-
Select the Journal.
-
Click the Manage button.
-
Click the Comments tab.
-
Click the Create button.
-
Under the Comment box, enter your comment.
-
Click the Create button.
Attachments
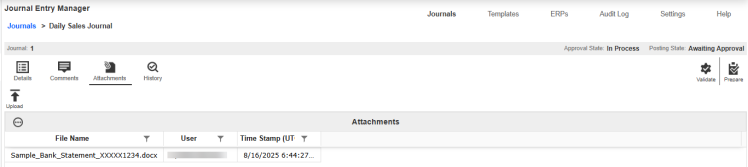
The Attachments tab enables you to add, view, and delete supporting documentation related to journals. This feature enables Preparers and Approvers to provide attachments that supplement the journal. Attachments can be uploaded by Preparers or Approvers, or viewed by Commentators or Viewers, at any time. Preparers and Approvers can only deleted their own attachments until the journal is fully approved
Add an Attachment
-
Go to Journals > Journals.
-
Select the Journal.
-
Click the Manage button.
-
Click the Attachments tab.
-
Click the Upload button.
-
Click the Browse button or drop your file within the File Upload dialog box.
-
Use File Explorer to browse and select the file you want to import
-
Click the Open button.
-
Click the Upload button.
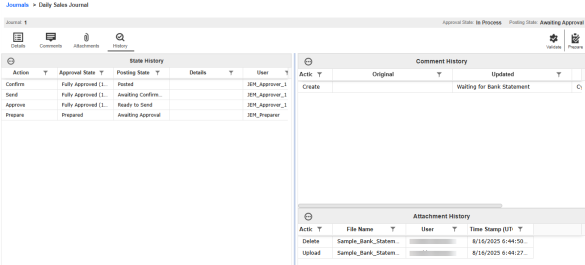
History
The History tab records various actions related to the journal. It is divided into three sections: State, Comment, and Attachment.
The State History grid lists the action performed, the resulting Approval and Posting State, and the responsible user. The details column displays any errors encountered during the send and posting confirmation process.