After creating a recurring journal definition, it can be managed through the Details, Schedules, Comments, Attachments, and History tabs.
NOTE: To close any of these tabs below, click the Close button on each tab page.
Details
The Details tab displays all information entered during recurring journal definition creation. See Create Recurring Journal Definitions.
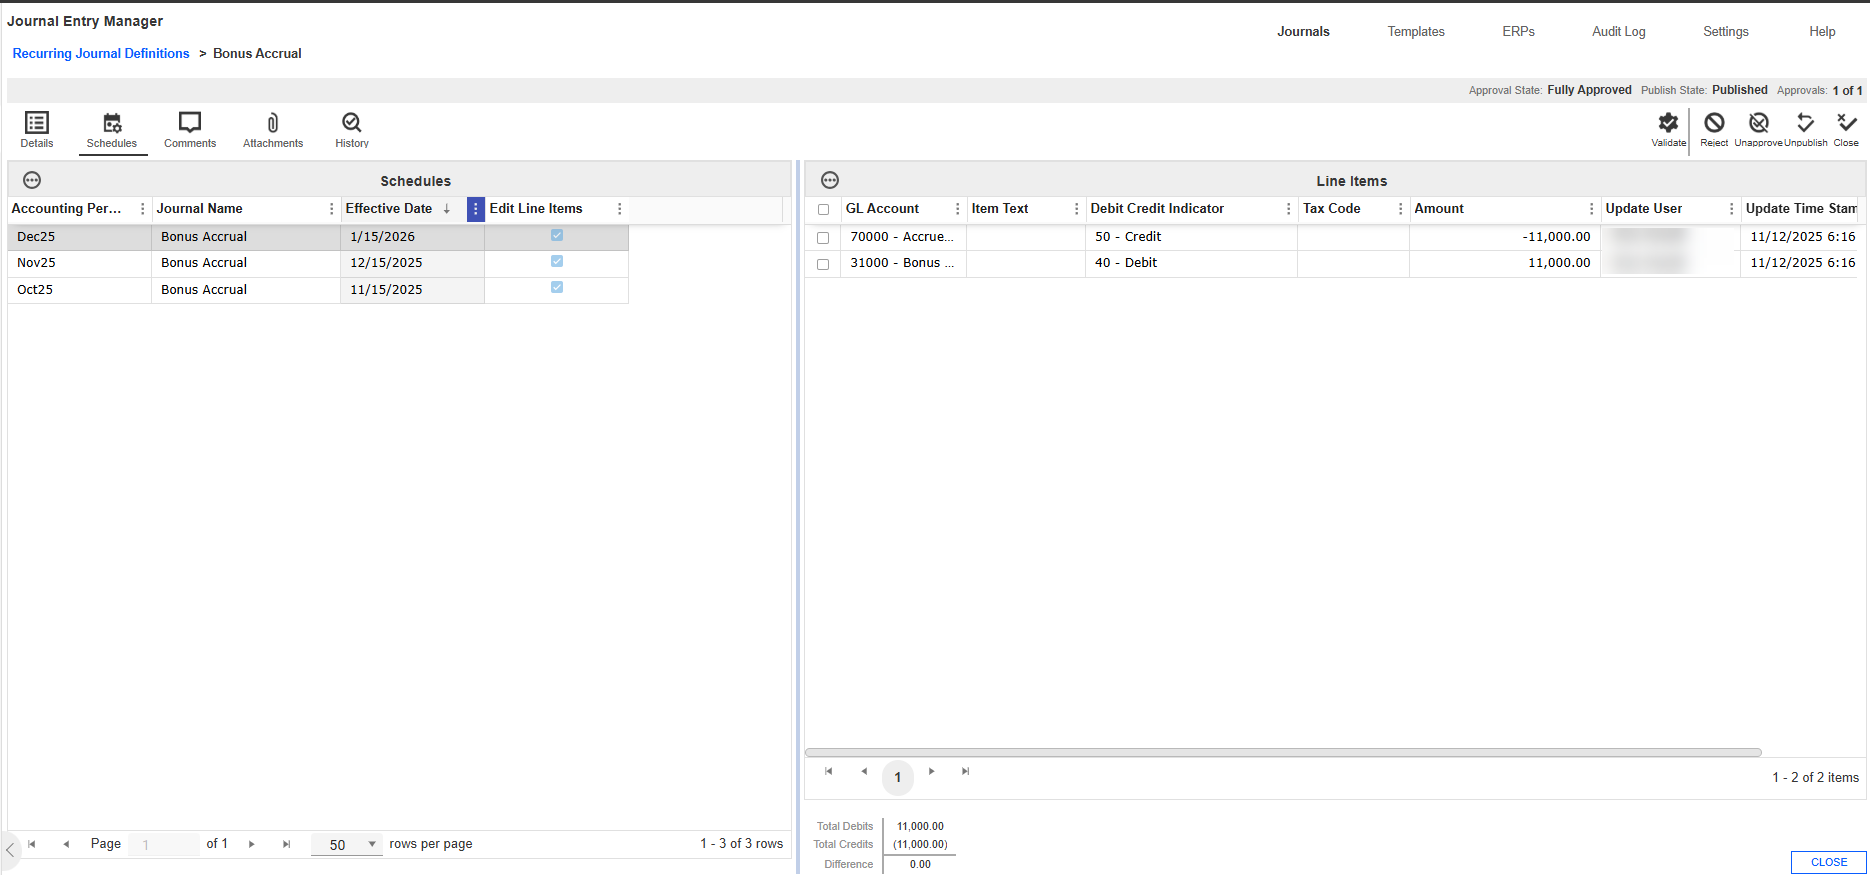
Schedules
The Schedules tab enables preparers, approvers, and administrators to customize recurring journal definitions entries for specific accounting periods prior to publishing. This enables mass creation and reduces backend adjustments during the monthly close.
The tab is split into two sections: Schedules and Line Items. Each row of the Schedules section represents a customized journal instance tied to a specific period. This allows preparers and approvers to manage period-specific journal customizations efficiently.
When a recurring journal definition is published, any schedules entries created in this tab are used in place of the default values from the Details tab for the specified periods.
Create
-
Go to Journals > Recurring Journal Definitions.
-
Go to the Schedules tab.
-
Click the Create button.
-
In the Create Schedules slide-out panel, complete the following fields:
-
From the Accounting Period drop-down menu, select one or more accounting periods.
-
Enter a Journal Name.
-
From the Edit Line Items drop-down menu, select Yes or No.
-
- Click the Create button.
Comments
The Comments tab enables you to view, create, edit, and delete comments within a recurring journal definition. Comments can be added at any time and are visible to all roles. Comments remain editable or deletable until the journal is fully approved.

Add a Comment
-
Go to Journals > Recurring Journal Definitions.
-
Select the recurring journal definition.
-
Click the Manage button.
-
Click the Comments tab.
-
Click the Create button.
-
Under the Comment box, enter your comment.
-
Click the Create button.
Attachments
The Attachments tab enables you to upload, view, and delete supporting documentation related to recurring journal definitions. This feature enables preparers, approvers, and administrators to provide files that supplement the journal. Attachments can be viewed by Commentators or Viewers at any time. Preparers and Approvers can delete only the attachments they uploaded, while Administrators can delete any attachment. Attachments remain editable until the journal is fully approved.

Add an Attachment
-
Go to Journals > Recurring Journal Definitions.
-
Select the journal.
-
Click the Manage button.
-
Click the Attachments tab.
-
Click the Upload button.
-
Click the Browse button or drop your file within the File Upload dialog box.
-
Use File Explorer to browse and select the file you want to import
-
Click the Open button.
-
Click the Upload button.
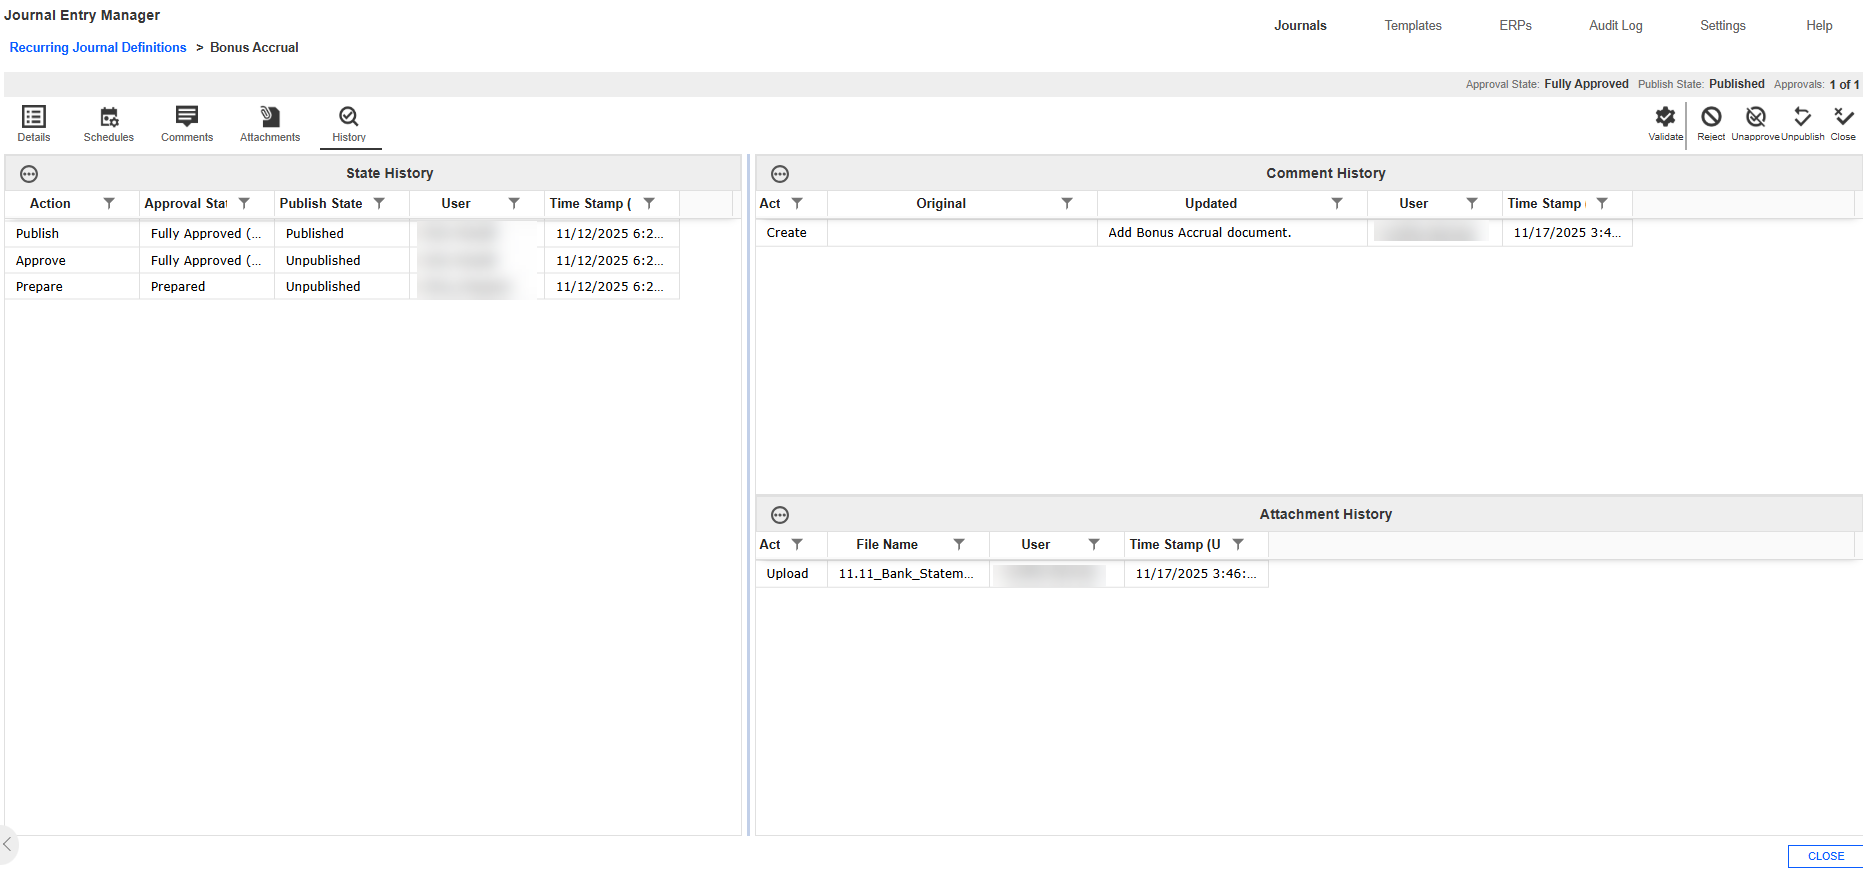
History
The History tab records actions related to a recurring journal definitions. It is divided into three sections: State, Comment, and Attachments.
The State History grid lists the action performed, the resulting Approval and Publish states, and the responsible user with a timestamp. The Attachments History grid tracks upload and delete actions, including file name, user, and timestamp. The Comment History grid logs comment creation, edits, and deletions, showing original and updated text, user, and timestamp.